Introduction
In this guide is designed for players looking to further invest in the Sailing lifeskill or are going for the Carrack. We will be covering sailing gear to use, sailing mastery, sea monster hunting, and a walkthrough of the sailing dailies (required to build a Carrack ship).
If you haven’t already, I also highly recommend joining the Sailing Discord for lots of great resources and to find groups for the sailing dailies or crocodile hunting.
Getting Started with Sailing
To get started with sailing/bartering, you will need a character with level 50 or higher and Skilled 1 in sailing, as well as an Epheria Sailboat or Epheria Frigate.
- You can buy an Epheria sailboat or Epheria Frigate from the central market
- Sailboats are generally used if you would like to do Bartering, and the Frigate is for if you want to do sea monster hunting or other naval combat.
- To achieve skilled 1 in sailing, complete the questline [The Great Expedition] First Sailboat into Oquilla’s Eye!
- This questline starts with the quest “Vigorous Velia“ and is available from your Black Spirit or Quest Log (O) under the Suggested tab
- Sometimes players automatically complete the quest or start the questline without knowing, so check under your quest log if the quest is missing.
- The questline can be done on all characters.
- This questline starts with the quest “Vigorous Velia“ and is available from your Black Spirit or Quest Log (O) under the Suggested tab
The questline takes a couple of hours to complete and you will need a ship, but the questline is very important to give you an introduction to bartering and will give you some free sailor slots. It is mostly running around and will introduce you to the Oquilla’s Eye Island. You will need to kill a few sea monsters, which won’t take too long.

Sailing Gear and Buffs
Below is a list of specific gear and buffs to use for Sailing. You should also aim to use as many Life EXP buffs as possible if you would like to level your sailing.
- Mermaid’s Wish buff reduces the chance of the Margoria Tornado or Ghost Ship encounter while sailing.
| Icon | Item Name | Buff | How to obtain |
|---|---|---|---|
|
Celerity Draught Does not stack with other |
Duration: 180 minutes (3 hours) |
Processing (L) > Simple Alchemy: Elixir of Training x36 Elixir of Time x36 Elixir of Wings x36 Tears of the Falling Moon x10 |
|
|
Unbridaled Celerity Draught Does not stack with other |
Duration: 360 minutes (6 hours) |
Processing (L) > Simple Alchemy: Elixir of Training x72 Elixir of Time x72 Elixir of Wings x72 Tears of the Falling Moon x20 Rumbling Earth Shard x1 |
|
|
[Ocean’s Embrace] Sailing/Bartering EXP Lightstone Set |
|
Lightstone of Flora: Uncharted Lightstone of Flora: Haggler Lightstone of Flora: Blue Iridescent LightstoneMore info in our Artifact and Lightstone Guide |
|
|
[Choice & Focus] Sea Monster Lightstone Set |
|
Lightstone of Fire: Rush Lightstone of Wind: Feather Lightstone of Wind: Fortune Lightstone of Wind: FortuneMore info in our Artifact and Lightstone Guide |
|
| Sethra’s Artifact – Sailing EXP (recommended) |
|
Rare drop from sea monsters and special barter | |
| Sethra’s Artifact – Sailing Mastery |
|
Rare drop from sea monsters and special barter |
|
| Sethra’s Artifact – Barter EXP |
|
Rare drop from sea monsters and special barter | |
| Sethra’s Artifact – Life EXP |
|
Rare drop from all Life Skills | |
| Sethra’s Artifact – Life Skill Mastery |
|
Rare drop from all Life Skills |
|
|
WON Dawn Crystal – Life EXP
|
Life EXP +4% | Processing (L) > Heating: Essence of Dawn x1, Trace of Nature x30, Magical Lightstone Crystal x500 | |
|
BON Dawn Crystal – Life EXP
|
Life EXP +8% | Processing (L) > Heating: WON Dawn Crystal – Life EXP x5 | |
|
JIN Dawn Crystal – Life EXP
|
Life EXP +15% | Processing (L) > Heating: BON Dawn Crystal – Life EXP x5 | |
 |
Loggia Sailing Log (up to +20) |
|
Sold by Camellia Loggia and Zaaira for 1 million silver |
|
Srulk Sailing Log (up to +20) |
|
Sold by Geranoa, Srulk, and Zaaira for 10 million silver |
|
Manos Sailing Log (up to +20) |
|
Processing (L) > Manufacture Manos Stone x5 Magical Shard x50 Supreme Tough Hide x50 Siren Song Aura x3 |
| Loggia Sailor’s Clothes (up to +20 enhancement) |
|
Sold by Camellia Loggia and Zaaira for 1 million silver | |
| Srulk Sailor’s Clothes (up to +20 enhancement) |
|
Sold by Geranoa and Zaaira for 10 million silver |
|
| Manos Sailor’s Clothes (up to +20 enhancement) |
|
Processing window (L) > Manufacture Ocean Sapphire x30, Manos Stone x5, Magical Shard x50, Red/Blue Coral x3 |
|
| Sailor’s Clothes Costume Set |
|
Purchase Professional Sailor’s Clothes at the Luxury Vendor. Then convert into into a costume using an Equipment Tailoring Coupon (1500 Pearls) |
|
| Bos’n Jack (Pet) |
|
Obtained from the Pearl Store during special limited sales |


Sailing Mastery
Higher Sailing Mastery will increase your ship’s stats (acceleration, speed, turn, break).
If you have 1500 points for example, you will have a 15% increase to all your ship’s stats (acceleration, speed, turn, break).
Sailing mastery is simply a quality of life improvement and not something I would heavily invest in. To reach high sailing mastery you would need to spend a lot of silver on the gear required, however if you have accessories from other life skills then you should use them for the ship stat increases.
| Sailing | |||||
|---|---|---|---|---|---|
| Mastery | Ship Stat increase | Mastery | Ship Stat increase | Mastery | Ship Stat increase |
| 3000 2950 2900 2850 2800 2750 2700 2650 2600 2550 2500 2450 2400 2350 2300 2250 2200 2150 2100 2050 |
25.00% 24.75% 24.50% 24.25% 24.00% 23.75% 23.50% 23.25% 23.00% 22.75% 22.50% 22.25% 22.00% 21.75% 21.50% 21.25% 21.00% 20.75% 20.50% 20.25% |
2000 1950 1900 1850 1800 1750 1700 1650 1600 1550 1500 1450 1400 1350 1300 1250 1200 1150 1100 1050 |
20.00% 19.50% 19.00% 18.50% 18.00% 17.50% 17.00% 16.50% 16.00% 15.50% 15.00% 14.50% 14.00% 13.50% 13.00% 12.50% 12.00% 11.50% 11.00% 10.50% |
1000 950 900 850 800 750 700 650 600 550 500 450 400 350 300 250 200 150 100 50 0 |
10.00% 9.50% 9.00% 8.50% 8.00% 7.50% 7.00% 6.50% 6.00% 5.50% 5.00% 4.50% 4.00% 3.50% 3.00% 2.50% 2.00% 1.50% 1.00% 0.50% 0.00% |
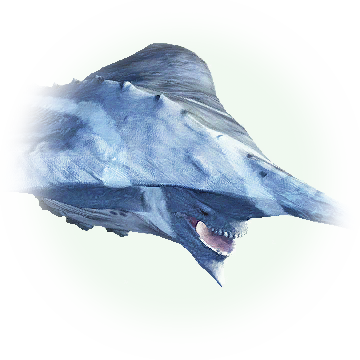
Sea Monster Hunting
Sea Monsters spawn in certain areas in the Margoria ocean.
The Young/Hungry versions can also be found in the Epheria and Velia seas. Young and Hungry sea monsters are easier to kill but give less loot than the harder versions. Sea monster zones are shown on the world map.

Certain monster zones are aimed at providing different materials depending on your current needs:
| Sea Monster Zone | Trait |
|---|---|
| Saltwater Crocodile Habitat | Materials for Chiro’s Ship Parts (blue-grade Epheria Carrack gear) |
| Lekrashan Habitat | Sea Crystals |
| [Predator of Vadabin] Black Rust Habitat | Black Stones for enhancing ship equipment |
| Goldmont Pirate Territory | Sailor/Sailing/Combat EXP Gains Sea Crystals and Black Stones for enhancing ship equipment at a lower drop rate than Lekrashan and [Predator of Vadabin] Black Rust Habitats |
| Hekaru, Ocean Stalker, Young Hekaru, Young Ocean Stalker, Sea of Silence Young Candidum, Young Nineshark, Young Black Rust |
Materials to upgrade Galleass and Caravels * Verdant Black Stone, Moon Scale Plywood, etc. |
Hekaru |
|
|---|---|
 |
Possible drops:
Knowledge can be obtained from Sihuram (requires 300 amity) |
Ocean Stalker |
|
 |
Possible drops:
Knowledge can be obtained from Bindo (requires 100 amity) |
Candidum |
|
 |
Possible drops:
Knowledge can be obtained from Gintabam (requires 400 amity) |
Black Rust |
|
 |
Possible drops:
Knowledge can be obtained from Siyunchae (requires 500 amity) |
Nineshark |
|
 |
Possible drops:
Knowledge can be obtained from Moran (requires 200 amity) |
Goldmont Small Battleship |
|
 |
Possible drops:
Knowledge can be obtained from Sihuram (requires 500 amity) |
Goldmont Medium Battleship |
|
 |
Possible drops:
Knowledge can be obtained from Haeran (requires 250 amity) |
Goldmont Large Battleship |
|
 |
Possible drops:
Knowledge can be obtained from Moran (requires 800 amity) |
Saltwater Crocodiles
In addition to the sea monsters above, there are also Saltwater Crocodiles, which spawn east of the Haso (Land of the Morning Light) region. These sea monsters are much harder, and I recommend finding a person to group with if possible. Up to two players can get loot from the Crocodiles. You may need to repair quite often, but it is possible to solo them with +10 green Carrack gear.
The Saltwater Crocodiles drop items such as:
| Item Name | Use |
|---|---|
| used to craft [Guild] Sea Monster’s Spirit Pouch, Nineshark Chandelier, or Ocean Stalker Chandelier furniture | |
| used to craft the Sea Monster Chandelier furniture | |
| used to craft Wave Residue Adhesive (Carrack blue gear material) | |
| used to craft Delicately Polished Support (Carrack blue gear material) | |
| used to craft Violent Wave Plywood (Carrack blue gear material) | |
| used to craft Violent Wave Plywood (Carrack blue gear material) | |
| used to craft Treasure Map of a Sailor (to obtain rewards and chance of obtaining items for Ebenruth’s Nol) |
Sea of Silence
Another sea monster zone, is the “Sea of Silence”, this area can be found to the east of Iliya Island, and has Cursed Pirate Ships. These ships drop materials to help you craft the Epheria Carrack.

The Cursed Pirate Ships drop items such as:
| Item Name | Use |
|---|---|
| used to craft green-grade Epheria Sailboat and Epheria Frigate gear | |
| used to craft the Sea Monster Chandelier furniture | |
| used to craft Manos accessories and equipment | |
| trash loot, can be sold to a vendor for 200,000 silver |
Hollow Maretta
Hollow Maretta <Melody of the Ocean> is another sea monster that can spawn randomly in the Margoria sea. When the sea monster spawns, Hollow Maretta’s Song will be played.
After being defeated, Hollow Maretta will not respawn for 1 hour.

Hollow Maretta confirmed spawn locations (last updated 27th Nov 2023):

Hollow Maretta drops items such as:
| Item Name | Use |
|---|---|
 Siren Song Aura Siren Song Aura(100% drop rate) |
used to craft the Manos Sailing Log |
| used to craft Treasure Map of a Sailor (to obtain rewards and chance of obtaining items for Ebenruth’s Nol) | |
| used to craft the Ebenruth’s Nol | |
| used to enhance blue grade Carrack gear or Panokseon gear | |
| used to craft Ship License: Panokseon (Panokseon ship material) | |
| used to craft Ship License: Panokseon (Panokseon ship material) and Panokseon blue-grade gear | |
| used to craft Ship License: Panokseon (Panokseon ship material) | |
Sethra’s Artifact – Life Skill Mastery |
Can be equipped in your Artifact equipment slot for bonus stats |
Sethra’s Artifact – Sailing Mastery |
Can be equipped in your Artifact equipment slot for bonus stats |
| Can be opened to obtain a random Lightstone of Flora | |
| sea crystal that can be equipped on ships | |
| sea crystal that can be equipped on ships | |
| sea crystal that can be equipped on ships |
Lekrashan
Finally, there is the Lekrashan sea monster. This sea monster has a chance of spawning when you defeat sea monsters at the Lekrashan’s Habitat (located south of the Haso region – Land of the Morning Light). The monster can drop loot for up to 3 people.

Lekrashan drops items such as:
| Item Name | Use |
|---|---|
| used to craft [Guild] Sea Monster’s Spirit Pouch, Nineshark Chandelier, or Ocean Stalker Chandelier furniture | |
| used to craft the Sea Monster Chandelier furniture | |
| used to craft Wave Residue Adhesive (Carrack blue gear material) | |
| used to craft Delicately Polished Support (Carrack blue gear material) | |
| used to craft Violent Wave Plywood (Carrack blue gear material) | |
| sea crystal that can be equipped on ships | |
| sea crystal that can be equipped on ships | |
| sea crystal that can be equipped on ships |
Sea Monster Regional Quests
Sea Monster regional quests can be completed by killing a certain amount of each sea monster in their monster zone. The regional quests are worth doing, and reward various materials for crafting ships and ship gear
- These quests are once-per-family
- Requires a level 50+ character
- You must enter the specific monster region for the quest to appear (in the top-right)
- Regional quests are numbered I – III and must be completed in order
| Sea Monster | Kills Needed | Region Quest Name | Reward |
|---|---|---|---|
 Ocean Stalker <Hungry> |
x2 | Ocean Stalker from the Great Ocean |
|
 Hekaru <Hungry> |
x2 | Hekaru from the Great Ocean |
|
Ocean Stalker Hekaru |
x10 | Hungry Sea Creatures’ Crystal I |
|
| x30 | Hungry Sea Creatures’ Crystal II |
|
|
| x50 | Hungry Sea Creatures’ Crystal III |
|
|
 Nineshark |
x15 | Nineshark Subjugation I |
|
| x30 | Nineshark Subjugation II |
|
|
| x50 | Nineshark Subjugation III |
|
|
 Black Rust |
x15 | Black Rust Subjugation I |
|
| x30 | Black Rust Subjugation II |
|
|
| x50 | Black Rust Subjugation III |
|
|
 Candidum |
x15 | Candidum Subjugation I |
|
| x30 | Candidum Subjugation II |
|
|
| x50 | Candidum Subjugation III |
|
|
 Cursed Pirate Ship |
x50 | Cursed Pirate Ship Booty I |
|
| x100 | Cursed Pirate Ship Booty II |
|
|
| x150 | Cursed Pirate Ship Booty III |
|
|
 Saltwater Crocodile |
x100 | Saltwater Crocodile’s Treasure I |
|
| x300 | Saltwater Crocodile’s Treasure II |
|
|
| x500 | Saltwater Crocodile’s Treasure III |
|
Sailing Daily Quests
Sailing Daily quests give the best sailing EXP and materials that are neeed to craft the Epheria Cararack. I recommend joining the Sailing Discord server, to join other players doing Sailies Dailies runs. Players often host their own sailing dailies platoon, allowing players to hitch a ride on their Carrack while they complete the quests. This way all you need to do is stand on the ship and accept/complete the quests when you arrive on land.
Below is a map of the dailies route we will be taking:
![]()
We will be starting the sailing dailies at Port Epheria or Velia, picking up the quests there.
You can leave an alt character at Port Epheria to pick up the quest at the start and then go back on your sailing character at the end to hand it in at the end. There are 3 quests at Epheria, but they only gives sailing EXP and Origin of Wind x1 so you can skip these quests if you are only interested in Carrack materials. The quests require Sailing Beginner Level 3 to collect.
- The Epheria quests can be picked up from Dius, next to the Wharf Manager on the Epheria docks.
| Quest Name | How to complete | Reward |
|---|---|---|
| A Treasure Swimming in the Ocean | Kill Hekaru or Kill Ocean Stalker |
|
| Outlaws of the Ocean | Kill Goldmont Large Battleship | |
| Stay Sharp! | Kill Goldmont Small Battleship |

- Next, travel to Velia or swap to your sailing character, and pick up all quests in Velia.
- There is a quest you can pick up from Croix, who is the Wharf Manager located on the Velia Docks.
- The Supplies Delivery quest is a timed quest, so you should only pick it up when you are ready to leave. You can delete the item and abandon the quest to retake it and restart the timer if needed.
| Quest Name | How to complete | Reward |
|---|---|---|
| Wanted: Hekaru / Ocean Stalker | Kill Hekaru or Kill Ocean Stalker |
|
| Looming Threats from the Ocean | Kill Goldmont Large Battleship | |
| Ocean Predators | Kill Goldmont Small Battleship | |
|
[Daily] Supplies Delivery (Iliya Island)
|
Deliver the trade goods to Illiya Island |
|

- There is also a quest you can pick up from Rovinia on the Velia Docks.
- The Supplies Delivery quest is a timed quest, so you should only pick it up when you are ready to leave. You can delete the item and abandon the quest to retake it and restart the timer if needed.
| Quest Name | How to complete | Reward |
|---|---|---|
| [Daily] Supplies Delivery (Tinberra Island) | Deliver Rovinia’s Supplies to Tinberra Island |
|

- Now head inside the Inn on the Velia Docks and find Miya and Proix.
- Miya has 3 quests you can choose from and then another you can pick up. I recommend choosing the Tinberra Island quest so you can complete it on the way to Oquilla’s Eye.
| Quest Name | How to complete | Reward | |
|---|---|---|---|
| Choose one of these quests |
Delivering Goods: Baremi Island | Deliver a barter item to Baremi Island | Sailing EXP |
|
Delivering Goods: Narvo Island
|
Deliver a barter item to Navro Island | ||
| Delivering Goods: Tinberra Island (recommended) |
Deliver a barter item to Tinberra Island |
- Next speak to Proix and pick up all the quests from him.
- The quest to cook Chowder is optional and can be completed later. Check the optional quests section below for more details.
| Quest Name | How to complete | Reward |
|---|---|---|
| Wanted: Hungry Sea Creatures | Kill Hungry Hekaru x3 and Ocean Stalker x3 | Sailing EXP |
| Wanted: Cox Scouts in Disguise | Kill Cox Pirates on the Island x20 | Sailing EXP |
| [Daily] How to Recover Sailors | Cook Chowder x3 | Sailing EXP |

- Now that you’ve picked up all the quests from Velia, jump onto your boat and head north towards Weita Island.
- Kill the Cox Pirates x20 on the island for quest, then continue heading north towards Iliya Island.
- Stop off at Iliya Island to pick up the next quests from Dario. You can also hand in your Supplies Delivery: Iliya Island quest at this NPC.
- Dario also offers an optional quest called [Barter] [Daily] Sailing to a Wider World you may want to pick up this quest as well to complete later on with the other bartering quests. Check the extra quests section below for more details.
| Quest Name | How to complete | Reward |
|---|---|---|
|
[Daily] Supplies Delivery (Oquilla’s Eye)
|
Deliver a barter item to Oquilla’s Eye |
|

- You may also want to pick up the 4 quests from the Villager (next to the Storage Keeper). These are bartering quests you can complete after your dailies and will return back to Iliya to complete.
- Maonil and Baori also offer optional bartering quests called Barter Goods Support I – II you may want to pick up these quest as well to complete later on with the other bartering quests. Check the extra quests section below for more details.
| Quest Name | How to complete | Reward |
|---|---|---|
|
[Daily] Lively Iliya Island
|
Successfully Barter 3 Times |
|
|
[Daily] Lively Iliya Island I
|
Successfully Barter 5 Times |
|
| [Daily] Lively Iliya Island II | Successfully Barter 10 Times |
|
| [Daily] Lively Iliya Island III | Successfully Barter 15 Times |
|

- Afterwards, head north towards Tinberra Island. You can stop at Al-Naha Island or kill the pirates on the north side of Iliya Island if you need more Cox Pirates needed.
- On the way to Tinberra, kill Hungry Ocean Stalkers x3 to complete the quest.
- Once you arrive at Tinberra Island, complete the delivery quests by handing over Barter Trade Goods at Mulicia and Rovinia’s Supplies to Shanjo
- Next, head north-west to Oquilla’s Eye. Kill Small Goldmont Battleship x3 between the islands on the way.
- After arriving at Oquilla’s Eye, pick up the quests from the two NPCs on the shore and hand over the bartering item for the Supplies Delivery quest.
- The first quests to pick up are from Ravikel, the wharf manager, Ravikel has several different quests, and you can choose between the Young or Adult versions of the sea monsters.
| Quest Name | How to complete | Reward | |
|---|---|---|---|
| Choose one of these quests |
[Daily] Old Moon Guild’s Candidum Hunter | Kill Candidum x1 |
[Basic Reward]
[Choose One]
|
| [Daily] Old Moon Guild’s Young Candidum Hunter | Kill Young Candidum x5 |
|
|
| Choose one of these quests |
[Daily] Old Moon Guild’s Nineshark Hunter | Kill Nineshark x1 |
[Basic Reward]
[Choose One]
|
| [Daily] Old Moon Guild’s Young Nineshark Hunter | Kill Young Nineshark x5 |
|
|
| Choose one of these quests |
[Daily] Old Moon Guild’s Black Rust Hunter | Kill Black Rust x1 |
[Basic Reward]
[Choose One]
|
| [Daily] Old Moon Guild’s Young Black Rust Hunter | Kill Young Black Rust x5 |
|

- After picking up the quests, turn to your left and there is a Soldier next to the Guild Manager NPC who has 3 quests for you as well.
| Quest Name | How to complete | Reward |
|---|---|---|
| [Daily] Our Guild is not a Charity Group | Kill Young Sea Monster x2 |
|
| [Daily] Do You Have What it Takes? | Kill Hekaru x1 |
|
| [Daily] Win-win Situation | Kill Ocean Stalker x1 |
|
- Once you’ve collected the quests on the shore, hop back onto the ship to proceed with the Ravikel quests.
- Head west from Oquilla’s Eye and kill Ocean Stalkers x1 and Young Ocean Stalkers x2 to complete the first 2 quests.
- Continue heading west to the Hekaru next and kill an adult Hekaru x1 sea monster.
- After killing the Hekaru, head west again to the Black Rust sea monster area. Kill Black Rust x1 (or Young Black Rust x5 for the Young Ravikel version) to complete the quest.

- Next, head north-east towards Cholace Chico’s Pirate Union (the Goldmon Pirate Territory).
- Kill Large Goldmont ship x1 to complete the quest.
- Continue towards the Shipwrecked Haran’s Cargo Ship. In this area, you can find the Nineshark x1 (or Young Nineshark x5 for the Young Ravikel version)
- Finally, continue in the same direction towards Pakio’s Combat Raft. Kill Candidum x1 (or Young Candidum x5 for the Young Ravikel version) to finish the final quest.

- After killing the Candium, you can finally head back south-east to Oquilla’s Eye to hand in the quests.

- When you arrive back to Oquilla’s Eye, hand in the quests at Ravikel and the Soldier.
- Now, head up the wooden stairs on the right. At the top, there is an NPC called Si Huram offering a quest. You can only choose one of the quest options. It is recommended to take the Velia option.
- Make sure you also use the chat option to pick up the Old Moon Trade Item.
| Quest Name | How to complete | Reward | |
|---|---|---|---|
| Choose one of these quests |
Through the Rough Tides: Epheria
|
Deliver Old Moon Trade Items to Sebastian in Port Epheria | 8500 Sailing EXP |
| Through the Rough Tides: Altinova | Deliver Old Moon Trade Items to Anthony in Altinova | 12000 Sailing EXP | |
|
Through the Rough Tides: Velia
(recommended)
|
Deliver Old Moon Trade Items to Robert in Velia | 15000 Sailing EXP | |
|
Through the Rough Tides: Ancado
|
Deliver Old Moon Trade Items to Jeremy in Ancado Inner Harbor | 15000 Sailing EXP |

- Now continue down the road to the south of the island. Curio, the Otter merchant offers 2 quests.
- For the first quest, you need to hand over Coral Piece x10. These can usually be bought from the central market, and you should keep a stock of them in your inventory to hand over straight away.
- For the second quest, you need to have over an Iridescent Coral Piece. This item can only be obtained by gathering the coral around Oquilla. You will need a Gathering Hoe tool to collect the coral. Use the screenshots below to help you find their locations.
- If you are in a sailing platoon, you are expected to have to have the items for these quests in advance so that you can turn them straight in and return to the ship, taking you back to Velia.
| Quest Name | How to complete | Reward |
|---|---|---|
| [Daily] Precious Coral Piece | Give Coral Piece x10 (these can be bought from the Central Market) |
|
| [Daily] For the Young Otter Merchants | Give Iridescent Coral Piece x1 (must be gathered using a hoe) |
|

Iridescent Coral Piece gathering locations:
More locations can be found on BDOlytics


- Finally, hop back onto the ship and head south towards Lema Island. Sail down towards Velia, staying on the east side of Lema Island so that you can pass through the Hungry Hekarus and islands with Cox Pirates in case you didn’t finish those quests earlier.
- Make sure you kiill Hungry Hekarus x3 on the way back to Velia.
- You can also make a quick stop at one of the islands on the way, to complete the 5 barter quest.
- Once you arrive at Velia, complete the quests at Criox, Miya, and Proix.
- If you picked up the Velia option from Si Huran, you can hand over the Old Moon Trade Item to Robert (Velia Guild Wharf Manager) to complete that quest as well. If you picked a different option, you will need to ride there on your horse to complete the quest.
- If you started at Port Epheria, you should now travel on your horse to Port Epheria, and hand in the final quests at Dius.
Extra Quests (Optional)
After following the Sailing Dailies guide above, you should have completed most of the quests.
The only one you should have uncompleted is the quest to cook Chowder x3. For this, you wil need a residence and a Cooking Utensil, as well as Professional Level 1 or higher in the Cooking Lifeskill.
The recipe for Chowder is:
- Dried Pearl Oyster Flesh x1
- Pepper x2
- Pork x2
- Milk x1
- Teff Bread x1
This quest can be completed by handing over the Chowder to Priox in the inn at Velia.
Other optional bartering quests can also be obtained from Baori (Iliya Island Storage Keeper), Dario (Iliya Island Wharf Manager) and Maonil.
These 3 quests don’t offer carrack materials, but are still worth completing alongside the other bartering quests for Sailing EXP, Crow Coins, and a Lost Trade Box.
The Lost Trade Box can be opened to give you a random Barter Item between level 1 and 5.
| Quest NPC | Quest Name | How to complete | Reward |
|---|---|---|---|
| Baori | [Daily] Barter Goods Support I | Hand over a Barter Lv. 1 trade good |
|
| Maonil | [Daily] Barter Goods Support II | Hand over a Barter Lv. 1 trade good |
|
| Dario | [Barter] [Daily] Sailing to a Wider World |
Barter 20 times
|
|
Oquilla Coin Exchange
![]() Oquilla Coins are obtained by completing the sailing daily or weekly quests, and once you have x50 coins, they can be exchanged at Herrad Romsen on Oquilla’s Eye for various ship materials.
Oquilla Coins are obtained by completing the sailing daily or weekly quests, and once you have x50 coins, they can be exchanged at Herrad Romsen on Oquilla’s Eye for various ship materials.
| 50 Oquilla Coins (Select 1 from the items below) | |||
|---|---|---|---|
| Tear of the Ocean x2 | Luminous Cobalt Ingot x2 | Great Ocean Dark Iron x6 | Cox Pirates’ Artifact (Parley Beginner) x3 |
| Cox Pirates’ Artifact (Parley Expert) x2 | Cox Pirates’ Artifact (Combat) x6 | Moon Scale Plywood x20 | Moon Vein Flax Fabric x6 |
| Deep Tide-Dyed Standardized Timber Square x6 | Tide-Dyed Standardized Timber Square x6 | Enhanced Island Tree Coated Plywood x20 | Bright Reef Piece x16 |
| Deep Sea Memory Filled Glue x16 | Pure Pearl Crystal x4 | Ruddy Manganese Nodule x4 | Seaweed Stalk x8 |

Otter Merchants and Oquilla’s Eye Chests
Otter Merchants have a random chance to spawn on Oquilla’s Eye, and tend to spawn approximately once per hour.
- When a merchant spawn, a message appears at the top of the screen saying “An Otter Merchant appeared nearby!”
- The otter then remains on the island for 5 minutes, and in this time you can exchange materials by interacting with them.
- There are different otters and each merchant offers different exchange rates
| Otter | Item you will exchange | Item Recieved |
|---|---|---|
| Pucio | ||
| Hecio | ||
| Ricio | ||
| Churio | ||
| Turio | ||
| Bolio | ||
| Girio | ||
In addition to the otter merchants on Oquila’s Eye, every 3 hours plumes of water will appear and drop treasure chests that have been resting deep in the ocean.
A notification will appear and the powerful plumes of water will appear at this time. They do deal damage but there is no death penalty if you die to them.

When a treasure chest is dropped, you have 1 minute to open it before it disappears.
You will need a silver key to open the chests and can recieve a varity of different items.
| Wooden Chest | Copper Chest | Silver Chest | Golden Chest |
|---|---|---|---|
| Tear of the Ocean | Tear of the Ocean | Tear of the Ocean | Tear of the Ocean |
| Ruddy Manganese Nodule | Ruddy Manganese Nodule | Seaweed Stem |
Ruddy Manganese Nodule |
| Lost Low Quality Trade Goods | Lost Medium Quality Trade Goods | Ruddy Manganese Nodule | Seaweed Stem |
| Ancient Gold Coin | Lost Low Quality Trade Goods | Lost High Quality Trade Goods |
Lost High Quality Trade Goods |
| Ancient Silver Coin | Ancient Gold Coin | Lost Medium Quality Trade Goods | Lost Medium Quality Trade Goods |
| Ancient Copper Coin | Ancient Silver Coin | Lost Low Quality Trade Goods | |
| Ancient Iron Coin | Ancient Copper Coin | ||
| Ancient Iron Coin |

Sea Karma (Naval Fame) is family-wide stat that is seperate from your normal “land karma” and can also apply to players that are under level 50.
You can lose Naval Fame by attacking and sinking other player’s ships.
- On ship hit: -50,000
- On ship death: -200,000
- On player hit: -50,000
- On player death: -200,000
- On khan-cannon hit: -3,000
- On khan-cannon death: -30,000

- Having negative Naval Fame will stop you from being able to use almost all Wharf Managers. You are limited to only using Kuit (Pirate) island to repair and resupply your ship.
- If your ship is destroyed while you have negative Naval Fame, your ship gear can also downgrade.
- If you have negative Naval Fame, you are unable to complete sailing dailes or use a Guild Galley.
If you decide the Salty Seas are not for you, you can restore your Naval Fame by defeating Sea Monsters:
- Lekrashkhan : 5300 Naval Fame
- Large Battlehip : 1800 Naval Fame
- Saltwater Crocodile : 1700 Naval Fame
- Violent Sea Monsters : 1700 Naval Fame
- Candidum : 1450 Naval Fame
- Nine Shark : 1450 Naval Fame
- Black Rust : 1450 Naval Fame
- Medium Battleship : 1000 Naval Fame
- Sea of Silence Ghost Ship : 1000 Naval Fame
- Ocean Stalkers : 850 Naval Fame
- Hekaru : 850 Naval Fame
- Nineshark/Young Candidum/Black Rust : 850 Naval Fame
- Small Battleship : 350 Naval Fame
- Hungry Monster : 280 Naval Fame
- Young Ocean Stalker/Hekaru : 280 Naval Fame
- Margoria Phantom Ship : 0 Naval Fame
- Cursed Pirate Ship : 0 Naval Fame