
Introduction
Farming is an AFK lifeskill that allows you to earn extra silver passively. You can obtain seeds and fruits by breeding, or can harvest the crops for materials. Farming goes well with the cooking lifeskill, since you can plant ingredients such as Onions, Garlic and Pepper, which are common bottlenecks for cooking.
Crops only grow while your account is logged-in, and require you to either tend to the crops yourself, or use workers to maintain the farms. You also need to spend Contribution Points to rent fences, and higher farming level allows you to use better fences and better seeds. With a good setup, you can make a decent amount of silver with minimal effort, since you only need to tend to your farm when the crops have finished growing.
How to obtain Farming Fences
To start farming, you need to obtain “Fences”. These are plots of land that you can place seeds onto.
Free Quest Fences
There is a once-per-family questline you can complete.
The quests reward you with ![]() Finto’s Strong Fence x2 and later in the questline, these can be exchanged for
Finto’s Strong Fence x2 and later in the questline, these can be exchanged for ![]() Klau’s Old Moon Fence x2
Klau’s Old Moon Fence x2
- Finto’s Strong Fence has no level restriction, and has 10 slots (the same as a rented Strong Fence).
- Klau’s Old Moon Fence requires Farming Master 1 to use, and has 10 slots (the same as a rented Old Moon Fence).
- The Old Moon Fence is a smaller farm, meaning you don’t have to move as far between each farm (saving you time) and don’t need to use as much fertilizer and water for your farms.
The questline can be found in your quest log (O) under “Suggested” > “[Life] Finto Family’s Fence Support”.

In addition to these fences, you can obtain a ![]() Shabby Fence by completing the quest “[Farming] Because I Like You” from Jemkas Wyrmsbane.
Shabby Fence by completing the quest “[Farming] Because I Like You” from Jemkas Wyrmsbane.
- Shabby Fence has only 1 slot, and the quest requires Gathering Beginner 7 or higher to start.
Renting Fences
Rented Fences can be obtain from an NPC and cost a certain amount of “Contribution points”.
Contribution points are earned by completing quests, and you can see your current/total Contribution points in the top left along with your Skill points and Energy.

There are 4 types of fences you can rent from NPCs:
| CP | Slots | Rented from (click for location) | |
|---|---|---|---|
| Small Fence | 3 | 4 | Difry Hussey (Abun), Enzo (Dias Farm), Mael Costa (Costa Farm), Martina Finto (Finto Farm) |
| Plain Fence | 6 | 7 | Finlin (Tarif), Goolie Gianin (Gianin Farm), Mayeri (Trent), Mercianne Moretti (Moretti Plantation), Norma Leight (Northern Wheat Plantation), Paola Toscani (Toscani Farm) |
| Strong Fence | 10 | 10 | Flaviano (Heidel), Geranoa (Calpheon), Lashir (Altinova), Zaaira (Velia), Kara (Grana), Derjeen (Duvencrune), Jorjua (O’draxxia), Purajin (Valencia), Tulga (Eilton) |
| Old Moon Fence (Requires Master 1) |
10 | 10 | Jak (Altinova), Klau (Velia), Lajee (Calpheon), Stee (Heidel), Zya (Grana), Taya (Duvencrune), Mene (O’draxxia), Sahin (Valencia), Ploux (Eilton) |
To quickly find an NPC which will rent a fence to you, open your NPC locator (magnifying glass) to the left of your mini-map. In the search box type in “fence” to show all NPCs you have discovered which will rent a farm to you.
Once you find an NPC, click the [Rent] button in the chat window, then “Confirm”.

The fence will go straight into your inventory. To return the farm and get your contribution points back, you need to go back to the NPC to give it back.
Contribution Points Efficiency
If you aren’t using workers to tend to your farms, using smaller fences is far more efficient for your CP. If you have 30 contribution points, you will get a total of 40 slots by using 10 small fences, compared to 30 slots using 3 strong fences.
If you are new to farming, aim to use as many small fences as you can. Only use strong fences if you want to use a total of 100 contribution points for the maximum of 100 slots or if you are planning to use mysterious or magical seeds (since these require 5 slots).
- Small Fences- 1.33 slots per CP
- Plain Fences – 1.16 slots per CP
- Strong Fences – 1.00 slots per CP
Pearl Store – Fence of Abundance
The Fence of Abundance is another type of fence you can obtain, but can only be bought from the Pearl Store for 1,200 Pearls each.
Pearl Store (F3) > Travel Aid > Buildables > Fence of Abundance
- The fence does not cost CP
- It is the same size as a Strong Fence with 10 seed slots
- You can only purchase a maximum of 8 per family
- The fence still counts towards your maximum of 10 fences

You can exchange the fence at any old moon manager for the Sturdy Fence of Abundance if you are at least Farming Master Lv. 1 or higher
| Slots | Exchanged at (click for location) | |
|---|---|---|
Sturdy Fence of Abundance |
10 | Jak (Altinova), Klau (Velia), Lajee (Calpheon), Stee (Heidel), Zya (Grana), Taya (Duvencrune), Mene (O’draxxia), Sahin (Valencia), Ploux (Eilton) |
- The Sturdy Fence of Abundance is the same as an Old Moon Fence and still has 10 seed slots
- The fence is smaller than the regular Fence of Abundance, meaning you don’t have to move as far between each farm (saving you time) and don’t need to use as much fertilizer and water for your farms.

Placing your farm
To place your farm you simply need to right-click the item in your inventory. Farms can’t be placed in safe zones and must be in a grassy area. When placing the farm make sure that all of the farm’s area is blue and none of the edges are in a red zone, then click the confirm button to start building your farm. (Click the image below to view full size)

Farms can overlap with another player’s farm, however, when you stand on your farm all other player’s farms will disappear so you can easily harvest your crops.
Once your farm is placed it can be found using this icon on your map. Farms expire if you do not interact with them for 14 full real-time days.
![2015-05-03_25910339[-2505_-23_-303]](https://blackdesertfoundry.files.wordpress.com/2015/05/2015-05-03_25910339-2505_-23_-303.jpg)
Where to place your Farms
I would personally recommend placing your farm North of Loggia Farm (near Velia). The location is suitable for most crops, a convenient location, and naturally has a high groundwater level.
If you would like to check locations for specific crops, please use this Google Sheet made by Summer.

How to efficiently place your Farms
You will want to place your farms as close to each other as possible because when it comes to tending to your farm, you can use less fertilizer/water if your farms are placed correctly. Make sure there is no gap between the farms! You’ll find more information on this below in the Tending to your farm section.

How to get seeds
There are a few different ways you can get seeds:
-
- Gathering – seeds can be gathered from bushes or thickets using your bare hands or a hoe. It is completely random which seeds you will get so the method can be very slow and take up a lot of energy, but it is the only way of getting free seeds.
-
- Seed Vendors – there are seed vendors at Loggia Farm, Olvia, Glish, Heidel, Calpheon, Kasula Farm, Altinova, Sand Grain Bazaar, and Valencia. They do have a poor selection of seeds and don’t offer higher quality seeds, but these are good starting points if you are looking to begin farming. You can use the NPC button in the top right (next to your mini-map) and then search for “seed” to quickly find all the seed merchants you have discovered.
-
- Central Market – the central market is where you want to go for your seeds if you’re looking to get top-quality crops straight away. Sometimes you can’t find the seeds you want but you can often find cheaper seeds here than from the vendors.
I highly recommend buying your seeds from the central market where you can because with most crops it will increase your profits if you choose to sell the crops. If you’re looking for maximum yield, buying the seeds instead of breeding the seeds will also increase the number of crops you are left with.


Planting your Seeds
To begin planting go up to your farming fence and press R to open installation mode.
Click the seeds in the top right (or press 1) and move them into place on your farm and click the confirm button (or press SPACE).
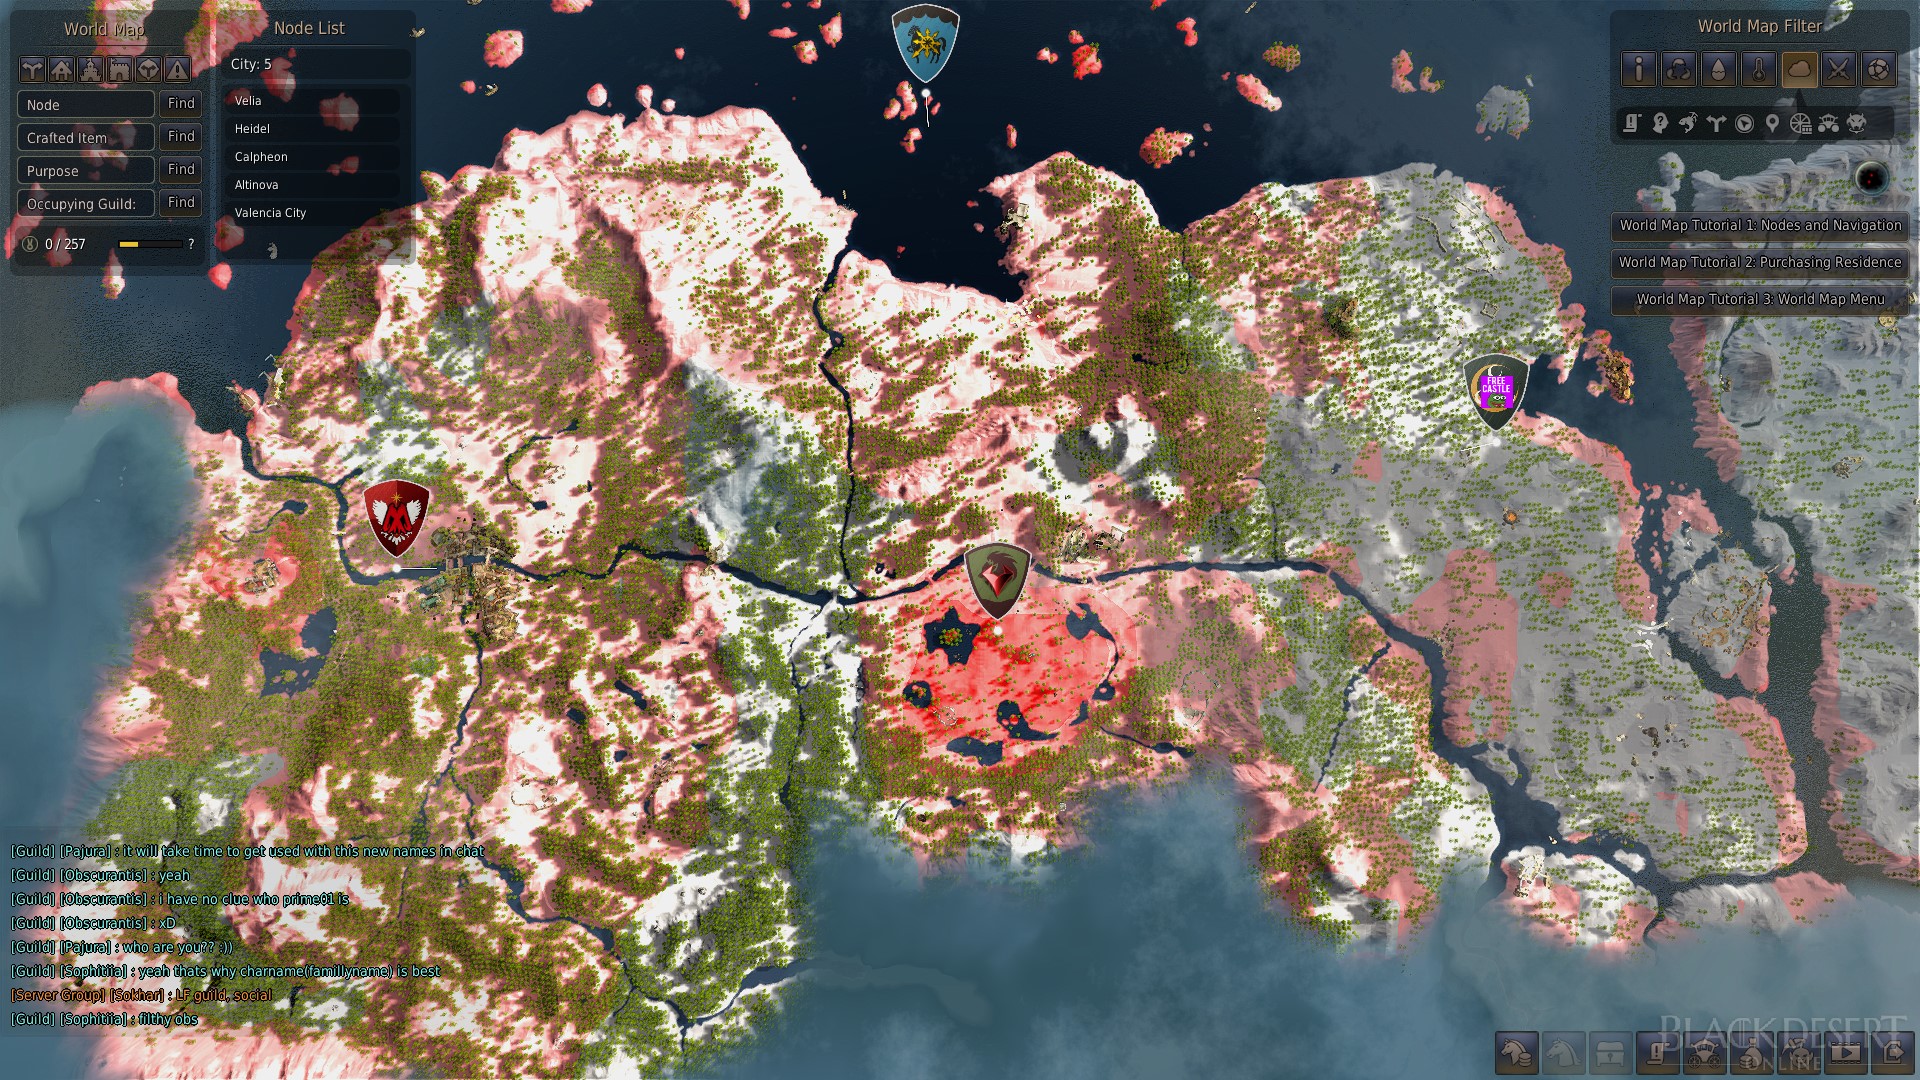
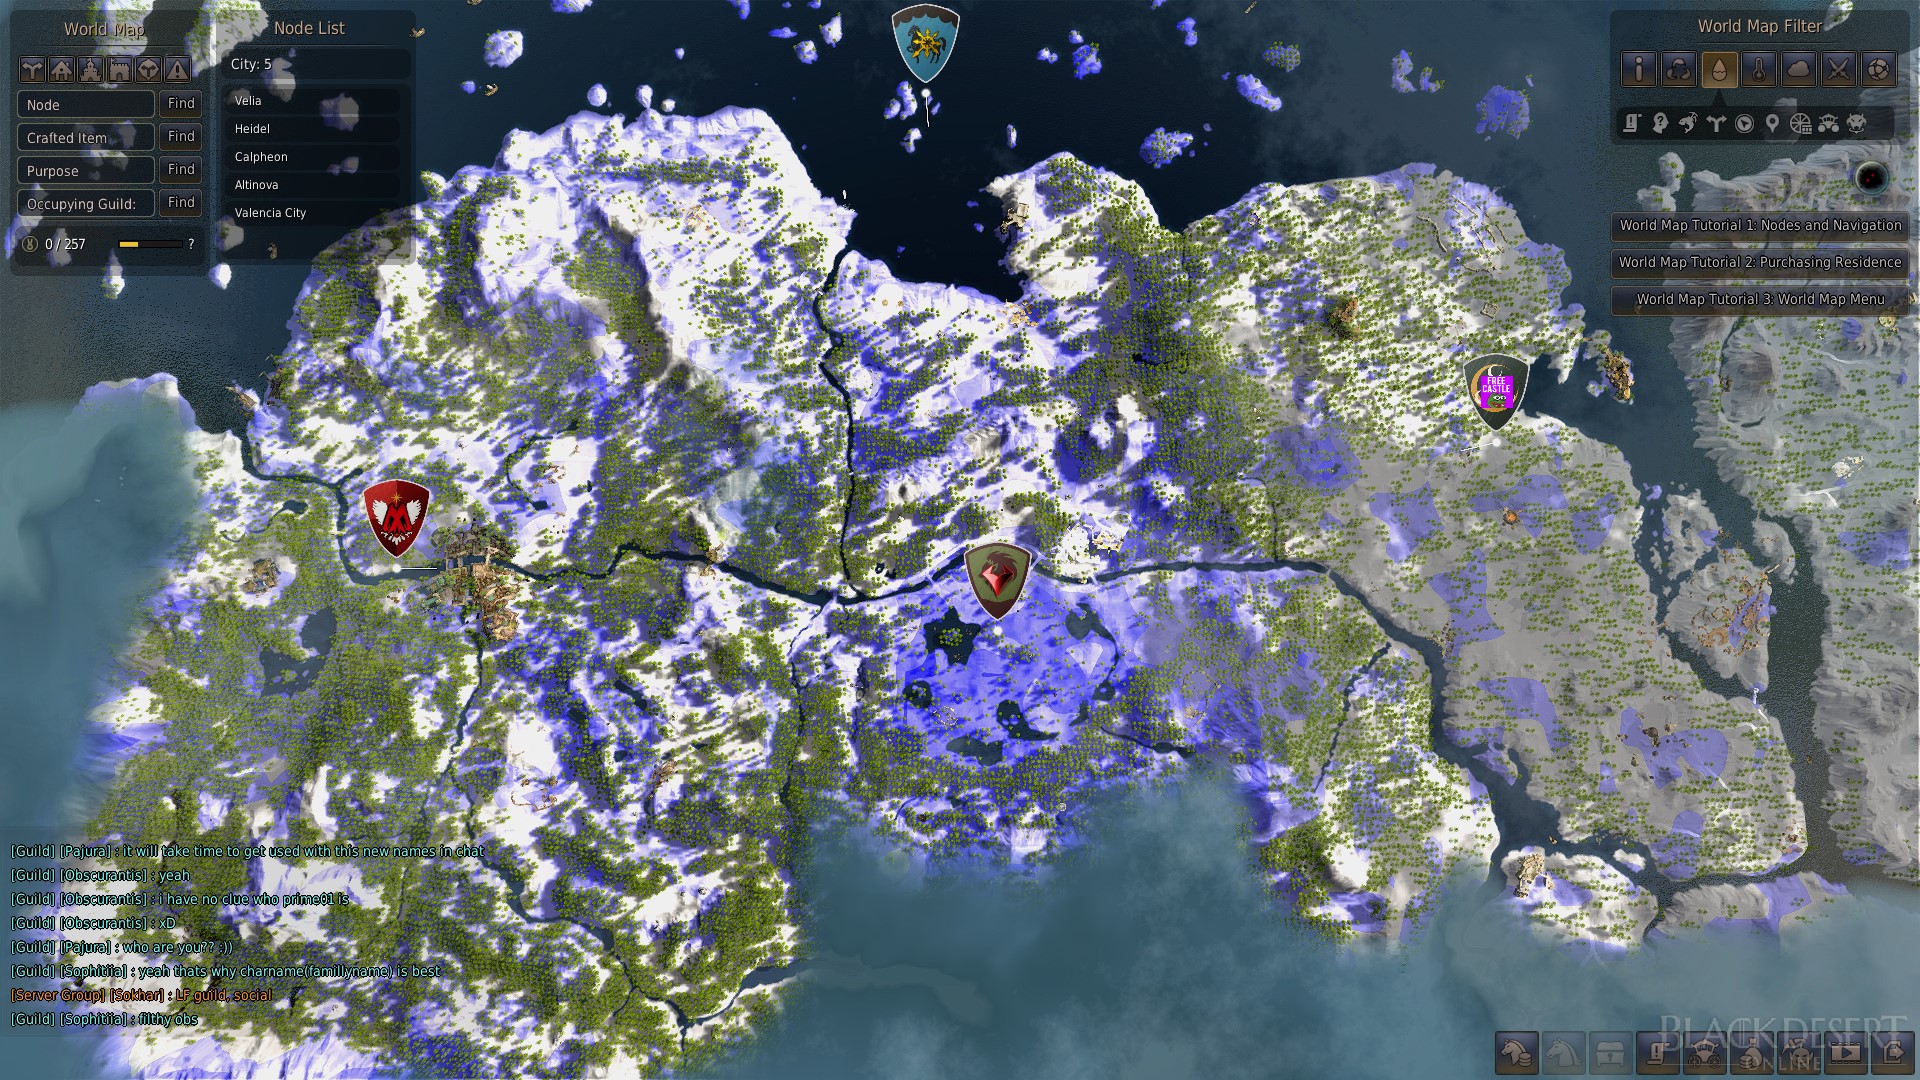
In the top left you can see “Garden Usage”, this indicates how many seeds we can fit on the farm. The window in the middle of the screen indicates the temperature, humidity, amount of water, and fertilizer the farm currently has. It also shows how long the seeds will take to grow. You can view the temperature, humidity, and groundwater using the filters on your world map.
It’s important to note that crops only grow whilst you are online!

Harvesting and Breeding
When your crops have reached 100% growth, you can go to your crops and press R to “Harvest”.
You also have the choice of “Breeding” the crops. If you choose to breed the crops you have a chance to get more seeds back, as well as increase the quality of the seeds, and obtaining fruits.

Harvesting
Once the crop is at 100% growth, you can harvest it to obtain crops:
- White grade seeds – an average of x65 white grade crops
- High-Quality seeds – an average of x50 High-Quality cops
- Special seeds – an average of x30 Special crops
- Magical seeds – an average of x150 Special crops (magical seeds take up 5 slots on your farm so the yield is x5 compared to Special seeds)
- Mysterious seeds – an average of x210 Special crops (mysterious seeds take up 5 slots on your farm so the yield is increased, however the seeds are not sustainable since they are a rare drop).
If the white/high-quality/special seeds use 2 slots instead of 1, the yield is also doubled
You also have a chance of extra yields which gives you an additional 1 – 5 crops.
Breeding
Breeding the crops gives you 1 to 3 seeds of the same quality or higher. Even if the growth is at 200% or the crop is rotted, it will not affect how many seeds you can get. You can also get Fruit of Nature when Breeding.
Crop Information
Temperature
- Temperature is how warm or cold the area is. Some crops, such as Sunflowers, will grow better in warmer temperatures. The bright red bar indicates the temperature range of your garden. The pointer shows the crop’s preferred temperature.
- The percentage on the right tells you the growth rate of the crop every 5 minutes. The highest percentage you can get is 1.80%.
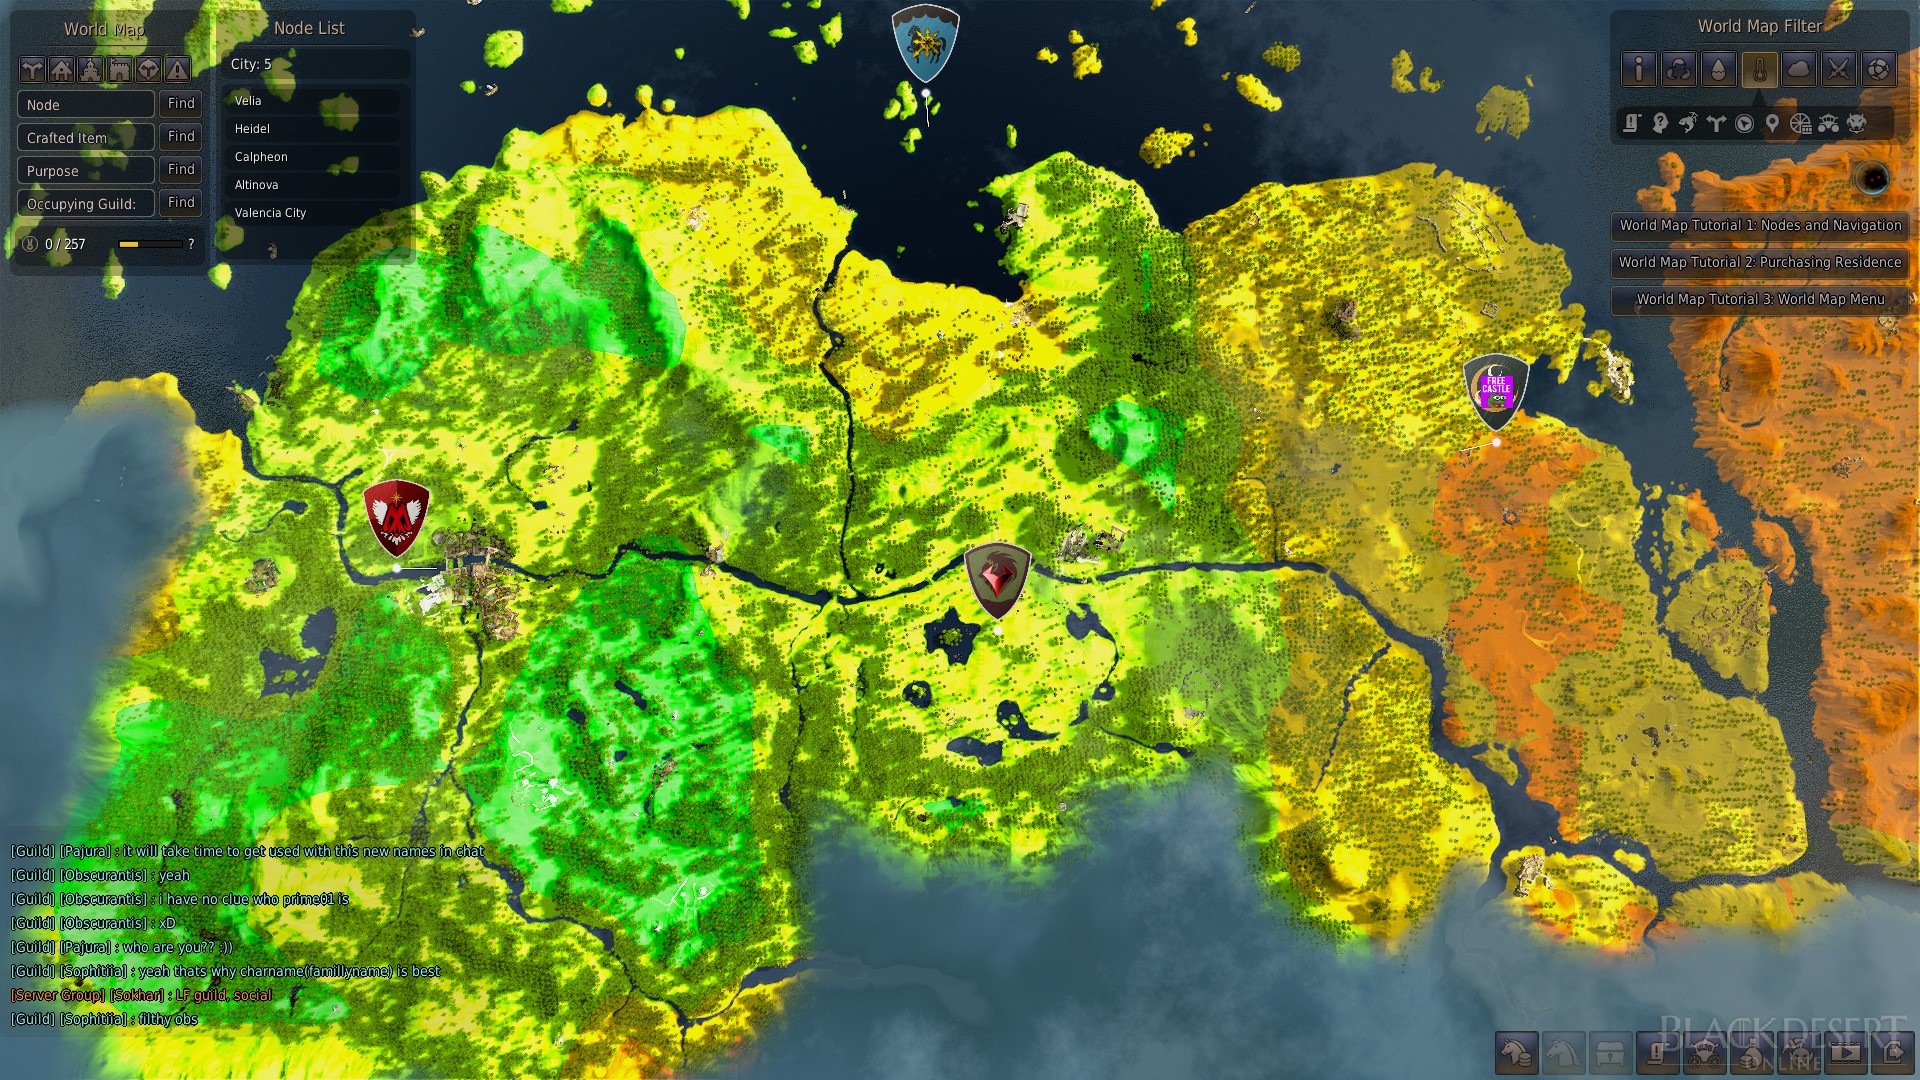
Humidity
- Humidity changes as it rains. The blue bar indicates the humidity of your garden whilst the pointer shows the crops preferred humidity.
- The percentage on the right tells you the chance of the crop getting blighted by insects or pests every 5 minutes. The highest percentage you can get is 10% and the lowest is 3%.
Groundwater
- Groundwater is the amount of water around your farm. When it rains this will increase. In places which are hotter, there may not be as much groundwater. You can use waterways to make groundwater last longer and give your crops the right amount of water that they need and you can manually pour water into the garden as well.
- The percentage on the right tells you the amount that the moisture will increase/drop every 5 minutes. You want the highest possible percentage as a negative percentage is how much it will drop. You will want to use water or waterways to increase the amount of groundwater.
- Groundwater is very important because if the moisture level reaches 0 then your plants will rot and you will only get 50% of your yield.
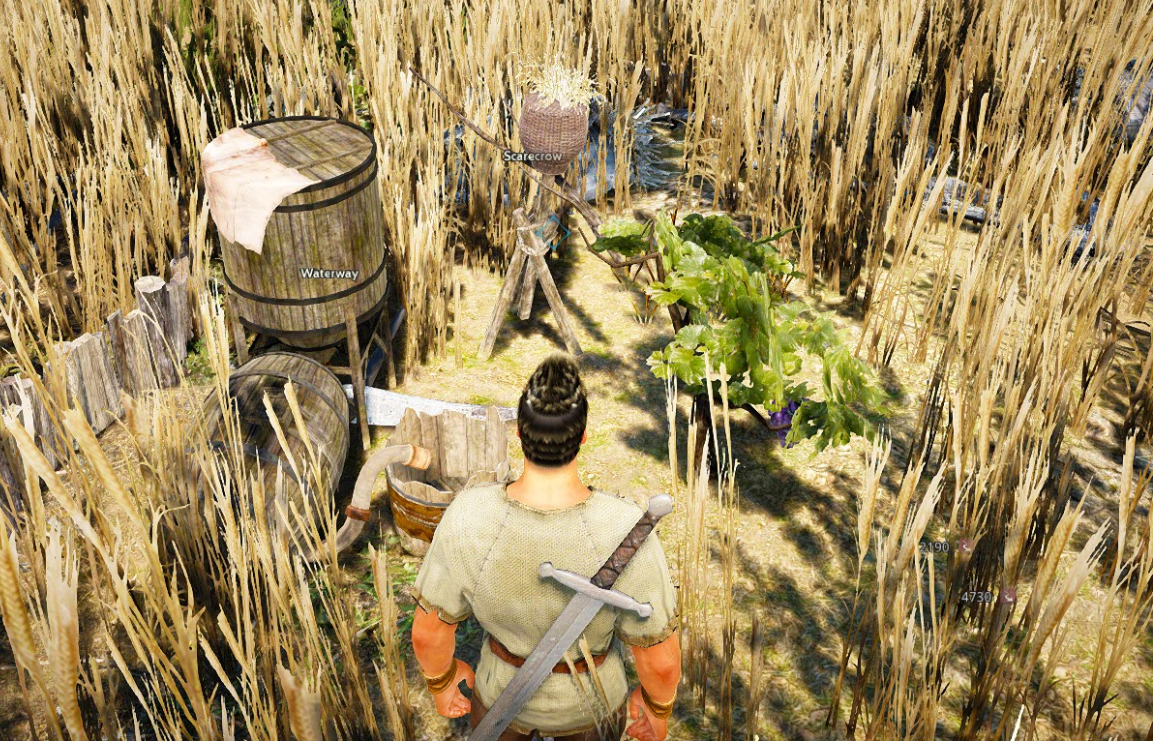
Scarecrows & Waterway
Scarecrows and Waterways are used to decrease the amount of time you need to spend tending to your farm and increase the quality of your crops.
Scarecrows reduce the chance of bird attacks, while waterways decrease the amount of water consumption. If your farm runs out of water your crops will either be lower quality or you will get far less crops than usual from the harvest. Waterways will make the natural groundwater last longer, but if you water your plants when you first plant them you shouldn’t need to come back to tend them for a much longer time.
To craft these items for your farm you will need a woodworking workshop. Once these items are placed on your farm they will take up a slot each so you will not be able to plant as many seeds but you won’t have to tend to them as often.
Personally, I don’t use scarecrows or waterways as I feel they take up too much space and are only efficient on Strong Fences. The damage from bird attacks is very minor and waterways are only really required in dry areas such as the desert.
Tending to your farm
Before I go into tending to your farm more, I would like to highlight the 2 main reasons for farming and how they play a role in tending to your farms.
Maximum produce
-
- If you are looking to collect materials for profit or production. I highly recommend using fertilizer, water and workers to tend to your farm. This will ensure that the growth time is as low as possible but you will not get any shards or farming XP.
- If you are looking to collect materials for profit or production. I highly recommend using fertilizer, water and workers to tend to your farm. This will ensure that the growth time is as low as possible but you will not get any shards or farming XP.
Leveling Life Skill, Sharp shards, other loot
-
- If you’re looking for the loot from pruning/removing insects, such as weeds, spirit’s leaf, shards, monk’s branch, etc. Then you will want to use no workers and tend to the farm as often as possible. You won’t want to use fertilizer or water (which will decrease your yields) but you will be able to tend to them more and level your farming quicker.
- If you’re looking for the loot from pruning/removing insects, such as weeds, spirit’s leaf, shards, monk’s branch, etc. Then you will want to use no workers and tend to the farm as often as possible. You won’t want to use fertilizer or water (which will decrease your yields) but you will be able to tend to them more and level your farming quicker.
Removing Insects/Pruning
If your farm needs tending due to insects or pruning, the farming icon on your world map will turn red to indicate this.

Insects and pruning will double the amount of time it takes for your crop to grow if it is left untreated but it does not affect the yield and you can actually leave it if you don’t mind the extra time it takes.
You can use workers to remove insects or prune for you but you will not get any loot.
Possible loot from removing insects is:
-
- 1 – 10 weeds
-
- Caterpillar
-
- Spirit’s Leaf
-
- Female Kermes
-
- Sharp Black Crystal Shard
Possible loot from pruning is:
-
- 1 – 10 weeds
-
- Twig
-
- Monk’s Branch
-
- Sharp Black Crystal Shard
Fertilizer/Water
Fertilizer can decrease the amount of time it takes your crops to grow by up to 20%.
There are 3 different Fertilizer items, the higher quality fertilizer, the longer it will last:
- Inorganic Fertilizer increases the crop’s fertilizer bar by approximately 50%.
- To craft Inorganic Fertilizer you will need either Wheat x5, Barley x5, Corn x5, Potato x5, OR Sweet Potato x5 (high-quality x3 products can be used or special x1 product – For example, Wheat x5, High-Quality Wheat x3 or Special Wheat x1). Pick which type of grain you’d like to use then press “L” to open the crafting window. Select the “Drying” option to turn the grain into Inorganic Fertilizer.
- Byproduct Fertilizer increases the crop’s fertilizer bar by approximately 65%.
- To craft a Fertilizer Byproduct you will need Inorganic Fertilizer x3 and Leavening Agent x2. Leavening Agent can be bought from a cooking merchant or innkeeper. Once you have the ingredients, press “L” to open the crafting window and select the “Shaking and Maxing” option.
- Organic Fertilizer increases the crop’s fertilizer bar by approximately 85%.
- To craft Organic Fertilizer you will need Byproduct Fertilizer x1 and Distilled Water x2 (you can also use River/Sea/Turbid/Clean Water x3 or Purified Water x2). To obtain Distilled Water, buy an “empty bottle” from a materials merchant, collect river water, then heat the river water. Once you have the ingredients, press “L” to open the crafting window and select the “Shaking and Mixing” option to craft Organic Fertilizer.
Watering your crops can increase the water deposit on your farm for up to 1 hour and reduce the rate at which the moisture will decrease.
You can use 4 different types of water:
- Purified Water is obtained by filtering a bottle of water or bag of muddy water. It is also sold by some general goods NPCs in Valencia. Purified water increases crop growth rate by Rain 15.
- Distilled Water is obtained by heating a bottle of river water. Distilled water increases crop growth rate by Precipitation 15.
- Mineral Water can be bought from cooking merchants. Mineral water increases crop growth rate by Precipitation 5.
- Bag of Muddy Water is obtained by shoveling in the desert or collecting water in the desert using workers. Bag of Muddy Water increases crop growth rate by Precipitation 5.
Make sure you are standing on the farm then right-click the water in your inventory to water the crops.
Advanced Tips
You do not need to use fertilizer/water on each farm and can actually use far less by placing your farms efficiently. The orange squares show how you should place your farms (leave no spaces), whilst the black dot shows where you should stand when using the fertilizer or water, and the black circle shows the range the fertilizer will reach.
Also, you should make sure you water the plants AFTER using fertilizer because using fertilizer will drain the water.
Using Workers
You can use your workers to tend to your farms while you are busy. They will prune weeds and remove bugs until they run out of action points but you can only have one worker on each farm at a time.
Workers will not harvest/breed seeds for you and you will not get any farming XP or Sharp shards. Farm workers also use a lot of beer very quickly!
To set up your workers so that they tend to your farm, left-click on the farm icon in the top right, then click the “list” button next to your farm. You can then select which worker you would like to send to your farm.

As you can see in the screenshot above, workers do not have to have to be connected to the nearby nodes. You can use any worker which is available but the worker will have to travel from where they are. The workers will store items all items they obtained by tending, at the warehouse. Giant workers are the best type of workers to use for tending to your farm, this is because Giant workers have more action points and will not need to be fed as often. They will usually be able to make it all the way through the growth of the plant without needing to be fed. The high-stamina named workers can also be used and are the best workers you can get.
Personally, I recommend pruning the farms yourself unless you have a lot of farms to tend to or not enough time to keep pruning them manually. Another option is to use workers until the crops are ~60% only. Doing this will let the crops grow quickly but the crops will usually need to be pruned when you harvest/breed them and you can get some sharp shards this way as well.
Which seeds to use for Farming
The best seeds to use are the Magical seeds. The reason you use these are because of pure convenience, as they take up more slots and require less tending to your farm. Their yield amount is x5 of a Special seed, to make up for the number of additional slots used. You can also use Mysterious Seeds as you obtain them for high amounts of Fruits or crops.
| Farming Goal | Crop Name | Growth Time | Farm Location | How to |
|---|---|---|---|---|
| Stonetail Fodder OR Contribution Point EXP |
Dry Mane Grass | 2hr 22m | Mediah/Valencia |
|
| Hump Mushroom | 2hr 40m | Velia | ||
| Dalvenia Alrea | 2hr 46m | Velia | ||
| Purple Mushroom | 2hr 46m | Velia | ||
| Fire Flake Flower | 2hr 46m | Velia | ||
| Fruits for Alchemy/Horse Attempts | Sunflower | 3hr 12m | Velia | |
| Dalvenia Alrea | 2hr 46m | Velia | ||
| Purple Mushroom | 2hr 46m | Velia | ||
| Tomato | 3hr 20m | Velia | ||
| Hump Mushroom | 2hr 40m | Velia | ||
| Pumpkin | 3hr 1m | Velia | ||
| Amanita Mushroom | 3hr 20m | Velia | ||
| Dry Mane Grass | 2hr 22m | Mediah/Valencia | ||
| Bluffer Mushroom | 3hr 44m | Velia | ||
| Ingredients for Cooking | Onion | 3hr 42m | Velia |
|
| Pepper | 4hr 6m | Velia | ||
| Hot Pepper | 4hr 13m | Velia | ||
| Garlic | 3hr 42m | Velia | ||
| Crops for Trading Crates | Purple Mushroom | 2hr 46m | Velia | |
| Sunflower | 3hr 12m | Velia | ||
| Alchemy Stone Polishing EXP | Purple Mushroom | 2hr 46m | Velia |
For pure silver profit the best seeds to plant can change regularly depending on market prices, you can also use this super helpful Google Sheet by Summer to calculate what seeds are best to grow for your particular schedule.
My general recommendations:
- Strawberry and Garlic crops are always a decent profit and their prices don’t tend to rise/fall very often. They are also good for any schedule.
- Use breeding to ensure you have enough seeds to replant, then harvest the rest of the seeds and sell the crops to the central market.
- Fruits can be sold to the central market, and your byproduct can be exchanged for Stonetail Fodder for additional profit.
Mysterious & Magical Seeds
Mysterious Seeds can be obtained by harvesting, breeding, pruning or killing pests on a Special/Magical seed. Mysterious seeds can then be processed with Processing (L) > Shaking, with a special seed/hypha to create Mysterious seeds.
For example, you can use a Mysterious Seed and shake it with a Special Strawberry Seed, to create a Mysterious Strawberry Seed.
Mysterious Seeds will take up 5 slots on a farm and highly increase the yield when harvesting, and also increase the amount of fruit when breeding (30 – 40 fruits per seed), but it is not possible to obain more seeds when breeding and you will quickly run out of them.
Another downside to using Mysterious Seeds is that you will not obtain byproducts when breeding them, and they do not give any extra chances of sharp shards or additional farming EXP when pruning, meaning that if you want these it’s better for you to plant the regular seeds. You cannot sell Mysterious Seeds on the marketplace, and when processing them, they are unable to proc.

Magical Seeds can be obtained when breeding Special seeds, once you reach Artisan 1 or higher in farming. These seeds also take up 5 slots on a farm, but unlike Mysterious seeds, you can obtain more magical seeds when you breed a magical seed, as well as byproducts and fruits.
Magical seeds should be used to make a profit and you should be breeding them to get high amounts of fruit. The byproducts you receive can also be exchanged for T9 horse materials which will heavily increase your profits.

Haystacks & Chicken Feed
Haystacks can be placed on your farm to feed cows. They take up 4 grid spaces in the garden but once a cow is fully grown, it can be harvested for milk, beef, and ox hide.
Haystacks are obtainable by going to the Processing window (L) and then selecting “Drying” to dry 50 Weeds. They are also available as quest rewards in the farming quest line.
Just like all other seeds, there are 2 additional grades of Haystacks: High-Quality and Special. These are obtainable when harvesting a Haystack.
Normal Haystacks give 12 – 20 milk, High Quality gives 25 – 40 milk and Special Haystacks can give an average of 50-60 milk each time. There is also a chance of gaining beef or ox hide and a special haystack gives an average of 15-20 beef or ox hide.
Chicken Feed can be placed on your farm to feed chickens. They take up 3 grid spaces in the garden but once a chicken is fully grown, it can be harvested for chicken meat and eggs.
Chicken Feed is obtainable by going to the Processing window (L) and then selecting “Grinding” to grind 20 Rough Stone and 100 Barley.
Just like all other seeds, there are 2 additional grades of Chicken Feed: Good and Special.
These are obtainable when harvesting Chicken Feed. Normal Chicken Feed give 15 – 30 eggs with 0 – 10 chicken meat and on average take around 8 hours to grow.
Farming Gear
Since Farming does not have any Life Skill Mastery bonuses or dedicated gear, it is recommended to use as many Life Skill EXP buffs as possible when tending to and harvesting your farm.
Since energy is important for farming, you may also want to use a character that has high gathering lifeskill level. This is because a higher gathering lifeskill level will reduce the amount of energy used.
Other Farming specific gear:
| Item Name | Buffs | How to obtain | |
|---|---|---|---|
|
[Magical Soil] Lightstone Set |
Farming EXP +25% | Lightstone of Flora: Harvest Lightstone of Flora: Harvest Lightstone of Wind: Harvest Iridescent Lightstone More info in our Artifacts and Lightstone guide |
|
| Sethra’s Artifacts – Farming EXP | Farming EXP +5% |
Obtained from Breeding and Harvesting Crops on your farm | |
 |
Life Crystal | Life EXP +5% |
Obtained as a quest reward from the [Repeat] Life Crystal quest at Hyunyong in LoML
Requires you to hand over Forest Crystal x1 and Trace of Forest x50 |
|
WON Dawn Crystal – Life EXP
|
Life EXP +4% | Processing (L) > Heating: Essence of Dawn x1, Trace of Nature x30, Magical Lightstone Crystal x500 | |
|
BON Dawn Crystal – Life EXP
|
Life EXP +8% | Processing (L) > Heating: WON Dawn Crystal – Life EXP x5 | |
|
JIN Dawn Crystal – Life EXP
|
Life EXP +15% | Processing (L) > Heating: BON Dawn Crystal – Life EXP x5 | |
| Magic Crystal of Infinity – Energy | Max Energy +10 |
Can be crafted using an Alchemy Tool (Alchemy Apprentice Lv 1+):
|
|
| Silver Embroidered Farmer’s Clothes (up to +5 enhancement) |
Movement Speed +1 to +4 Level Farming EXP +5% to +40%(depending on enhancement) |
Costume Mill (Level 1) Cotton Fabric x12, Trace of Forest x10, Black Stone Powder x15 |
|
| Farmer’s Clothes | Farming EXP +10% Gathering +1 |
Can be purchased from Luxury Vendor NPCs for 1,500,000 silver |
|
| Agris Outfit Set (Pearl Store Outfit) |
Farming EXP +30% Farming Time -2 sec |
Can be purchased from the Pearl Store for 2,200 Pearls |
Klau’s Old Moon Seed Pouch
Klau’s Old Moon Seed Pouch is a bag with 50 slots that allows you to store seeds. The Seed Pouch can be obtained once per family by completing a quest.
- To plant seeds stored in the pouch, move them to your inventory first, then use them in a Fence.
| Klau’s Old Moon Seed Pouch | |
|---|---|
| How to Obain | Reward |
|
Requires Farming Skilled 1 or higher.
Accept and complete the “[Farming] Klau’s Old Moon Seed Pouch“ quest from the Black Spirit.
※ Make sure to set your Quest Type to “All” at the bottom of the Quests (O) window to see this quest.
|
 |

Powerleveling Farming
It’s possible to quickly level your farming all the way to Artisan 1 in just a few days. This unlocks the Magical seeds and heavily increases the profit you will make from farming.
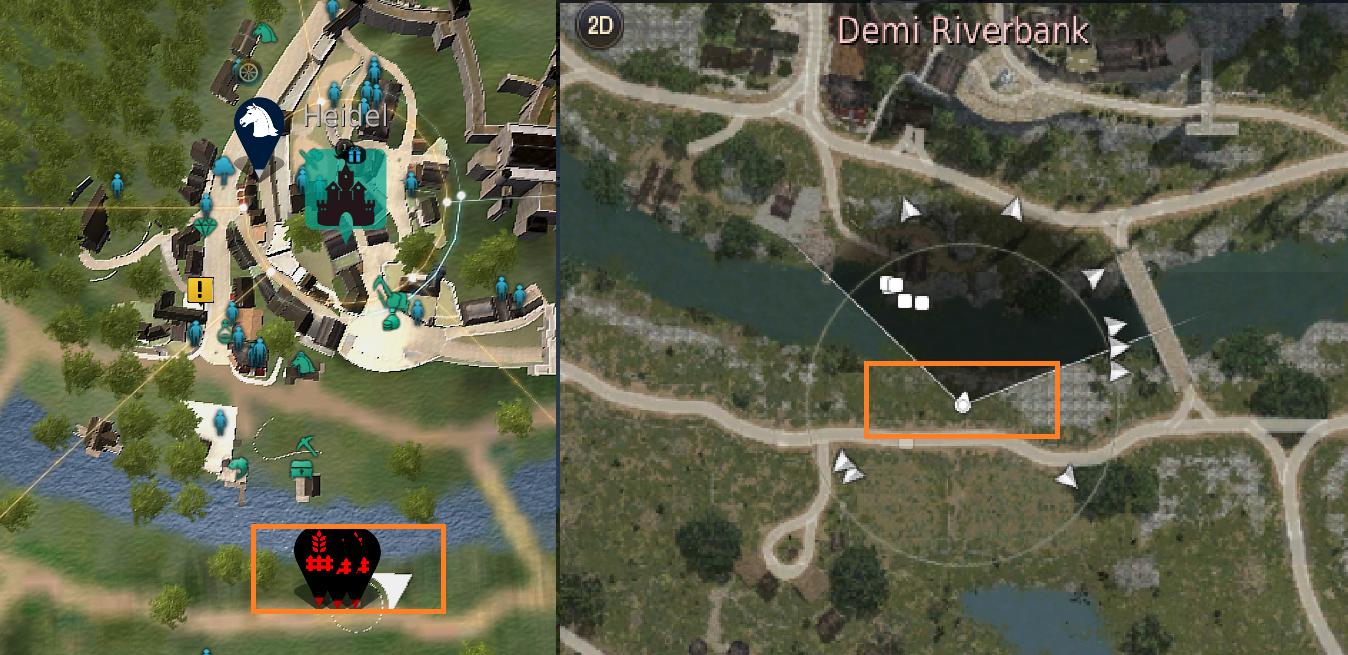
You will need to rent as many farms as possible, and then place them outside the south of Heidel along the river (see image below). Ideally, you will want to get x10 of the Strong Fences for 100 CP so you have the maximum amount of crops you can plant. The fewer farms you have the longer it will take to reach Artisan 1.
Buy Special Purple Mushroom seeds from the Central Market, and plant them on your farms.

You will notice that the Humidity and Temperature in Heidel is not suitable for these crops. This means you will need to prune and kill pests much more often. Tend to the farms as often as possible then breed the seeds once they are 200% and repeat.
You may run out of energy if you have all 10 Strong Fences, so a Kamaslyvia Blessing and using a bed for extra energy will be very useful. More ways to regen your energy can be found in our Energy Guide.
It’s not necessary and I wouldn’t waste silver on getting all the life skill buffs, but you should use Seafood Cron Meal, Silver Embroidered Farmer’s Clothes, and Verdure Draught to boost your EXP gains since they are cheap to obtain. Other life skill EXP buffs can be found in our Life EXP Buff List
Pit-A-Pat Moles
When tending to your farm, there is a chance that you can loot a ![]() “Mole’s Feed“. This item will appear in your gathering window, but will cosume when you loot it, and spawn a mole.
“Mole’s Feed“. This item will appear in your gathering window, but will cosume when you loot it, and spawn a mole.
- A light beam will appear where the mole spawns
- Killing the mole will drop various loot: Blush Leaf, Spirit Pouch of Ferocious Beast, and Black Stones.
![]() Chances of looting Mole’s Feed:
Chances of looting Mole’s Feed:
- White grade/High-Quality/Special seeds = 0.6% chance
- Mysterious and Magical seeds = 3% chance
- Chicken Feed = 1.8% chance
- Haystack = 2.4% chance
The chance is doubled for seeds that use double slots.

There are different rarities of moles that can spawn:
- <Hungry> Mole
- <Caught in the Act> Slowpoke Mole
- <Greedy> Pudgy Mole
- <Lost> Giant Mole
- <Playful> Pit-A-Pat Mole
The Pit-A-Pat Mole is the rarest mole and will drop one ![]() Pit-A-Pat Petal each time you kill them. You can exchange 10 petals at Jemkas Wyrmsbane for a permanent mole pet.
Pit-A-Pat Petal each time you kill them. You can exchange 10 petals at Jemkas Wyrmsbane for a permanent mole pet.

| Mole | Possible Loot |
|---|---|
|
<Hungry> Mole (60% chance of spawning) |
|
|
<Caught in the Act> Slowpoke Mole (24.8% chance of spawning) |
|
|
<Greedy> Pudgy Mole (10% chance of spawning) |
|
|
<Lost> Giant Mole (5.2% chance of spawning) |
|
|
<Playful> Pit-A-Pat Mole (20% chance of being a Pit-A-Pat Mole if it you spawn a Giant Mole) |
|
Farming Byproducts
When breeding crops, you have a chance of obtaining an item called “Blush Leaf“.
You can then exchange x20 of this item at NPC Liana or NPC Camelia Loggia, for other materials, or Contribution and Farming EXP.
- Liana can be found in all major cities next to Jetina/Fughar/Stable Keeper. If you cannot find the NPC, use the “Find NPC” function to search for “Liana” (ESC Menu > Function > Find NPC)
- Camelia Loggia can be found at Loggia Farm in Balenos
It is recommended to exchange Blush Leaf x20 for ![]() Stonetail Fodder since this is an item required for Tier 9 Dream Horse attempts.
Stonetail Fodder since this is an item required for Tier 9 Dream Horse attempts.
| Required Items | Exchangeable Items (Select one) | ||
|---|---|---|---|
|
Blush Leaf x20
|
Byproduct Fertilizer x4
|
||
|
Special Pepper Seed x4
|
|||
|
Stonetail Fodder x1
|
|||
| 900 Contribution EXP + 30 Farming EXP |

Old Byproducts
On 21st September 2022, farming byproducts were changed and the items below are no longer obtainable. However, you have any left over, you can still craft them into Stonetail Fodder using Simple Cooking and x20 of 2 different byproducts:
 Mutant Plant
 Premature Fruit
 Unusual Fruit
 Seed Half Eaten by a Bird
Crop Exchange (Cooking Lifeskill)
If you are using your farms to obtain ingredients for the Cooking Lifeskill, you can swap certain Special grade crops for a lower-grade version.
This is done so that you don’t waste Special grade ingredients on Cooking recipes that only require a small amount of the ingredient.
For example, the Grilled Sausage recipe only needs x1 white-grade Onion, a Special Onion can be substituted as 3-5 white-grade Onions, so you wouldn’t want to waste a Special Onion for each recipe craft.
Exchange locations and NPCs:
- Loggia Farm – Camellia Loggia
- Olvia – Bofin
- Glish – Urahr
- Heidel – Hunt
- Calpheon City – Ahr
- Altinova – Irvin
- Kasula Farm – Bumorki
- Sand Grain Bazaar – Buchrin
- Valencia City – Salebin
- Grána – Vilentia
- Delmira Plantation – Kayle
- Maslan’s Yulas Citron Orchard – Purari
| Item Name | Exchanges for |
|---|---|
|
High-Quality Pepper x2 OR Pepper x4 |
|
|
|
High-Quality Garlic x2 OR Garlic x4 |
|
High-Quality Onion x2 OR Onion x4 |
|
|
High-Quality Hot Pepper x2 OR Hot Pepper x4 |
FAQ
Where should I put my farm?
Velia is usually the go-to spot for most crops, with the farms placed near the cliff just north of Loggia Farm. This is because it has a suitable temperate for most crops and decent groundwater, as well as being convenient for players.
Refer to this image as well for farm placement and where to stand when using fertilizer/water.
Here is a table of crop growth times for Velia and Epheria:

Does growth affect yield?
Should I use fertilizer and water?
Yes! You should always use fertilizer on your farm because it drastically decreases the amount of time it takes for the crops to grow.
The fertilizer goes onto the whole farm and even replanted crops will still be affected by fertilizer still lingering on the farm.
I personally only use water if the crop water rate is very low but most of the time you can get away with not needing to water the crops, especially in Velia where the groundwater is quite decent.
Here is an image of where to stand when using fertilizer to make sure it reaches the most amount of fences
Should I use workers and which ones?
For the best efficiency and money per hour, you should be using workers on your farms. If you are looking to level your farming or want sharp black crystal shards, then it is better to prune the crops yourself.
Giants are the best to use, or if possible named workers with high stamina. The location the worker comes from does not matter because the worker will stay on the farm until all the stamina is used and does not go back to the origin town unless they run out of stamina.
What should I grow for profit?
If you are above Artisan 1 you should be using Magical seeds, these are obtained by breeding special seeds and take up 5 slots.
You can then have 2 options depending on the seeds you plant:
- Breed the seeds and sell them to the vendor
- Breed enough seeds to replant and then harvest the rest and sell the crops on the marketplace
Either way, you will also be making money from Fruits and byproducts (which you turn into Stonetail fodder) and selling these for profit on the marketplace as well.
I highly recommend checking out this Google sheet which is automatically updated with prices to show the best crops you can plant for profit. It also has other useful information such as growth times and where to place your farms for optimal growth. If you are on Xbox or PS4 then make sure to check the prices in-game.
If you are under artisan 1, I would personally recommend planting Special Onion seeds and then breeding enough to replant and then harvesting the rest and selling on the market. Other good options are Strawberries, Garlic and Sunflowers.
How do I obtain Stonetail Fodder?
Stonetail fodder can be obtained by exchaning Blush Leaf x20 at Liana. Blush Leaf is a byproduct you obtain when farming.
Stonetail Fodder can also be made using the old byproducts (no longer obtainable) if you still have any left over. You can craft it in the processing window (L) then selecting Simple Cooking. You will need x20 of 2 different byproducts (Unusual Fruit, Plant with Rotting Roots, Seed half eaten by a bird, Premature fruit, Mutant Plant).
Each craft will give you 1-3 Stonetail Fodder regardless of any of your life skill levels.
How do I get Magical Seeds?
You get magical seeds by breeding special seeds of the same type. You must be artisan 1 in farming to start getting these! Sometimes it can take over 100 special seeds before you get one, it is just bad luck, unfortunately! Magical seeds cannot be bought or sold on the market.
As soon as you are artisan 1 you should be using Magical seeds because they have many benefits, such as high prices when sold to an NPC, and also saves a lot of time and energy since you don’t have to plant as many seeds.
What are Old Moon Fences?
Old moon fences are unlocked after you reach master 1.
They have the same amount of slots (10) and CP cost (10 CP) as a strong fence but are much smaller, meaning you can place the fences in a smaller area which is more efficient for harvesting and also when using fertilizer because you can reach all 10 fences with 1 fertilizer.
Old moon fences can be rented from Jak, Klau, Lajee, Stee, Zya


Under the Fertilizer, the “fermenter” is the leavening agent sold by the cooking merchant.