Introduction
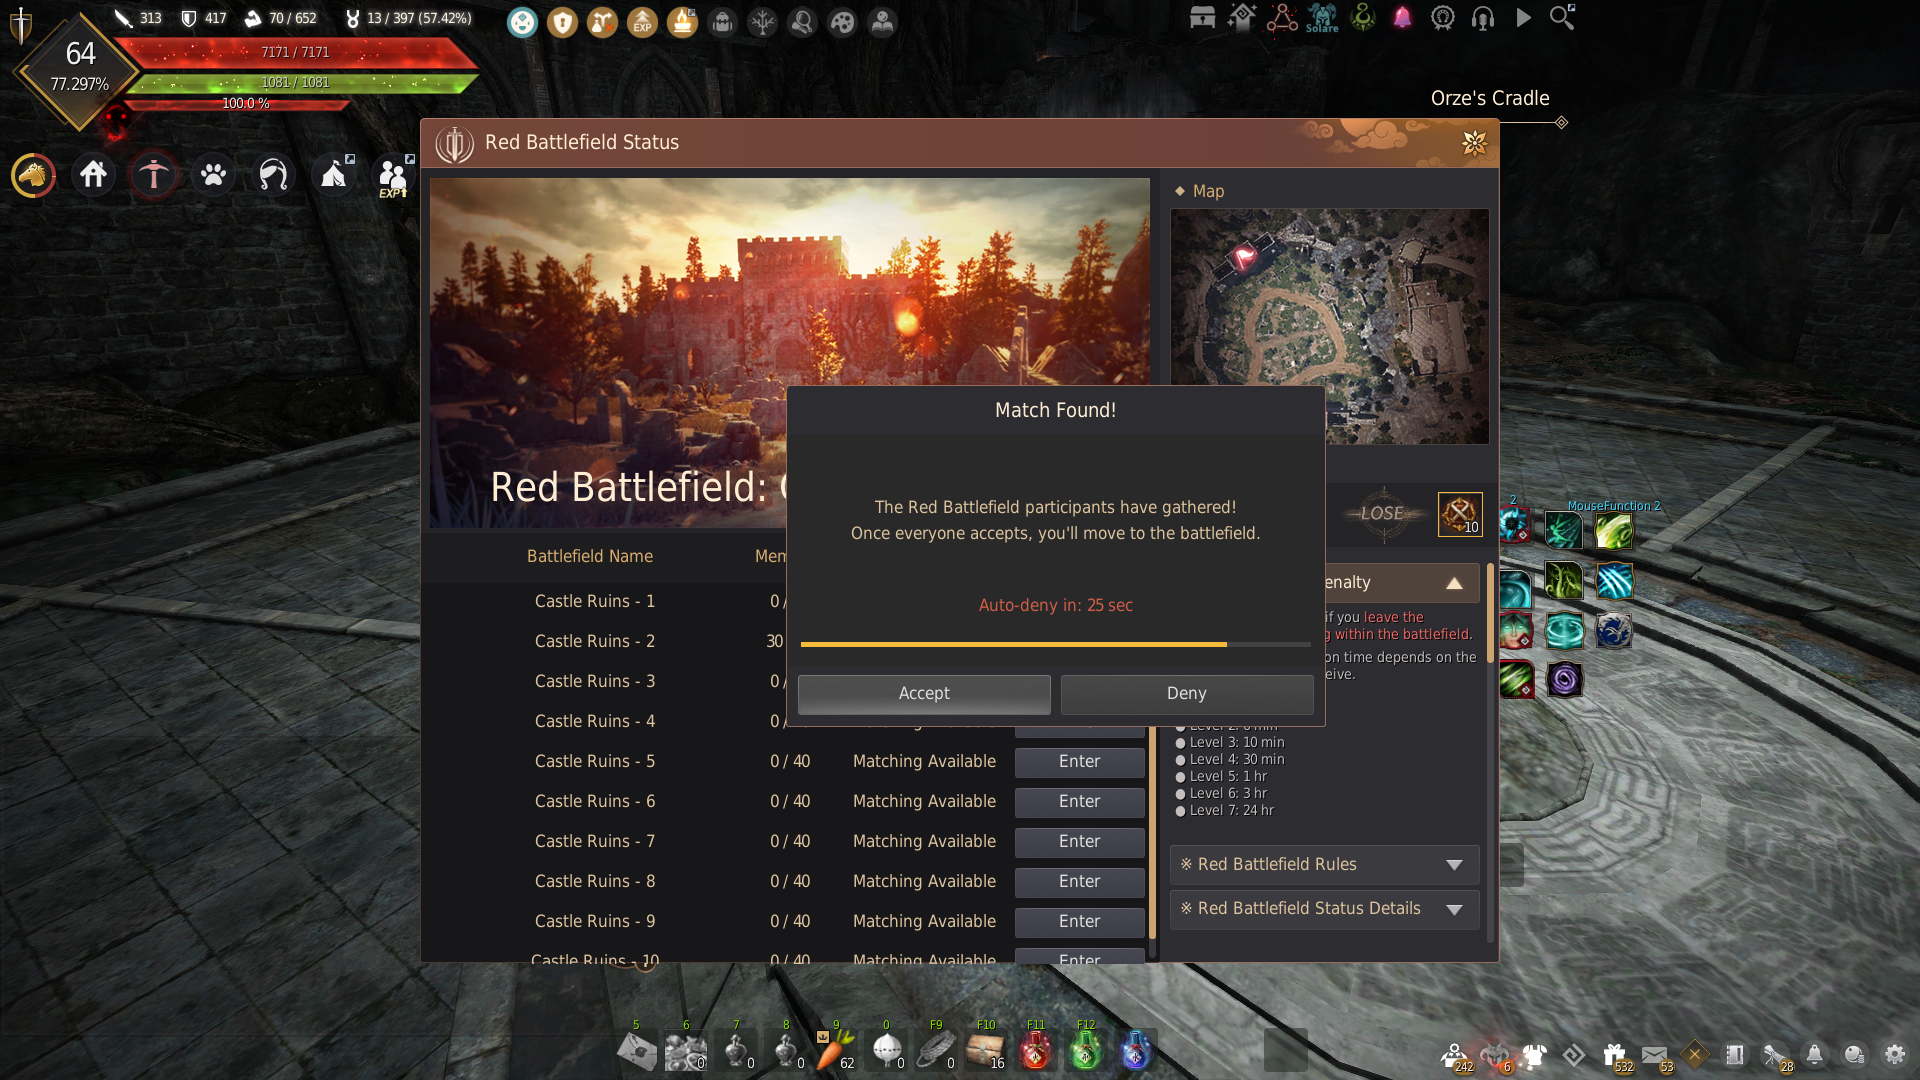
You can join the Red Battlefield at any time by opening the main menu (ESC), then selecting “War” and then “Red Battlefield”. Click the “enter” button on a battlefield to begin matchmaking and join the queue. Once enough players sign up, you’ll be able to enter the battlefield.
There are 3 Battlefield maps:
- Castle Ruins (currently unavailable)
- Garmoth’s Nest (currently unavailable)
- Valencia City (currently available)


Common Rules
Once you’ve joined the battleground, you will be teleported to the arena. Here you will be assigned a red or black faction and will be able to kill any other player on the opposing faction without any PvP penalties.
- Each battle requires a minimum of 16 people to start, and can have a maximum of 20 players (10 on each team).
- The battle will last 15 minutes.
- You can only join the battle within the first 3 minutes from the start of the match (more than 12 mins remaining).
- You cannot join the battleground if you are in a party.
- Camouflage costume effects are disabled within the Red Battlefield.
Whilst in the Red Battlefield, you can talk to Daz and buy extra large HP (+275), MP (+375), and Herbal Juice (+250). These potions can only be used in the Red Battlefield but weigh 0.01LT and cost 1 silver each.
Upon spawning, you will also automatically obtain a special buff that will give you increased evasion and damage reduction for 9 seconds (or 16 seconds on the Garmoth’s Nest map).
To leave the Red Battlefield, open your main menu (ESC) at any time. Logging out, leaving the battleground, or when the battleground is finished, you will return to your original place in the world.
Castle Ruins Map
The objective of the Castle Ruins Map is a team death match. Players must work together to kill the opposite faction and the aim is to have the most team points at the end.
Each person will start with 10 points by default.
Killing a player with higher points will give you a higher point reward while killing a player with low points will give you a lower point reward.
- Killing a player with 0-10 points rewards you with 5 points
- Killing a player with 11-19 points rewards you with 7 points
- Killing a player with 20-29 points rewards you with 14 points
- Killing a player with 30-39 points rewards you with 21 points
- Killing a player with 40-49 points rewards you with 28 points
- Etc.
If you kill an enemy, the points you earn depend on the points of your enemy. If you kill an enemy, you will earn 1/2 of the enemy’s score
If you die, you will lose 1/4 of your score
You will always have and earn a minimum of 1 point
Garmoth’s Nest Map
The objective of the Garmoth’s Nest Map is a team death match. Players must work together to kill the opposite faction and the aim is to have the most team points at the end.
Garmoth’s Nest is very similar to the original Castle Ruins map and has many of the same rules, but there are some small differences:
- Garmoth’s Nest has 3 random spawn locations for each team instead of being a fixed spawn location
- Garmoth will randomly attack adventurers by breathing fire both on land and while flying overhead
- 5 minutes after the battlefield begins, pots will appear in the area, which you can break to obtain items that grant you powerful buffs
Valencia City Map
The objective of the Valencia City map is different from the other available maps. For this map, you must occupy the capture points to increase the team’s score. The first team to accumulate 3,000 points will win the match. If the time runs out, the team with the highest score will win.
There are a total of 5 areas that can be occupied. Each occupied area gives 1 point score per second. Below you can see a map showing the spawn locations and the 5 capture points.
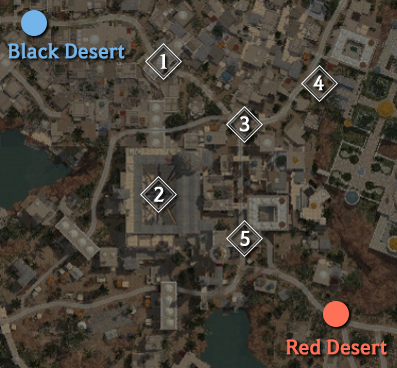
| Unoccupied Area | Black Desert Occupied Area | Red Desert Occupied Area |
|---|---|---|
| Yellow icon | Blue icon |
Red icon |
If the area is contested, a flame will appear above the icon as indicated below:  |


AFK Penalties
If you leave the battlefield or stay idle for too long, you’ll get a penalty that stops you from joining matches for a while.
- Penalties come in stages.
- If you leave the battlefield for too long, you’ll get a penalty, and each penalty increases your penalty level by two stages.
- If you don’t move after entering the battlefield, you’ll get warnings. Keep ignoring them, and you’ll get a penalty. Stay idle for too long, and penalties stack up, raising your penalty level.
-
If you have a penalty, you can check how long it lasts by pressing the Red Battlefield entry button.
| Level 1 | Level 2 | Level 3 | Level 4 |
|---|---|---|---|
| 3 min | 6 min | 10 min | 30 min |
| Level 5 | Level 6 | Level 6 | |
| 1 hour | 3 hour | 24 hour |
Rewards
Once the battle is complete, rewards will automatically be sent to all participants.
| Results | Rewards |
|---|---|
| Victory |
|
| Defeat |
You can exchange ![]() Battlefield Tokens directly in the Manage Currency UI.
Battlefield Tokens directly in the Manage Currency UI.
- Click the Manage Currency icon
 on the top right of the screen (next to your mini-map).
 - Or open the UI by going to the ESC Menu – Rewards (F3) – Manage Currency Menu
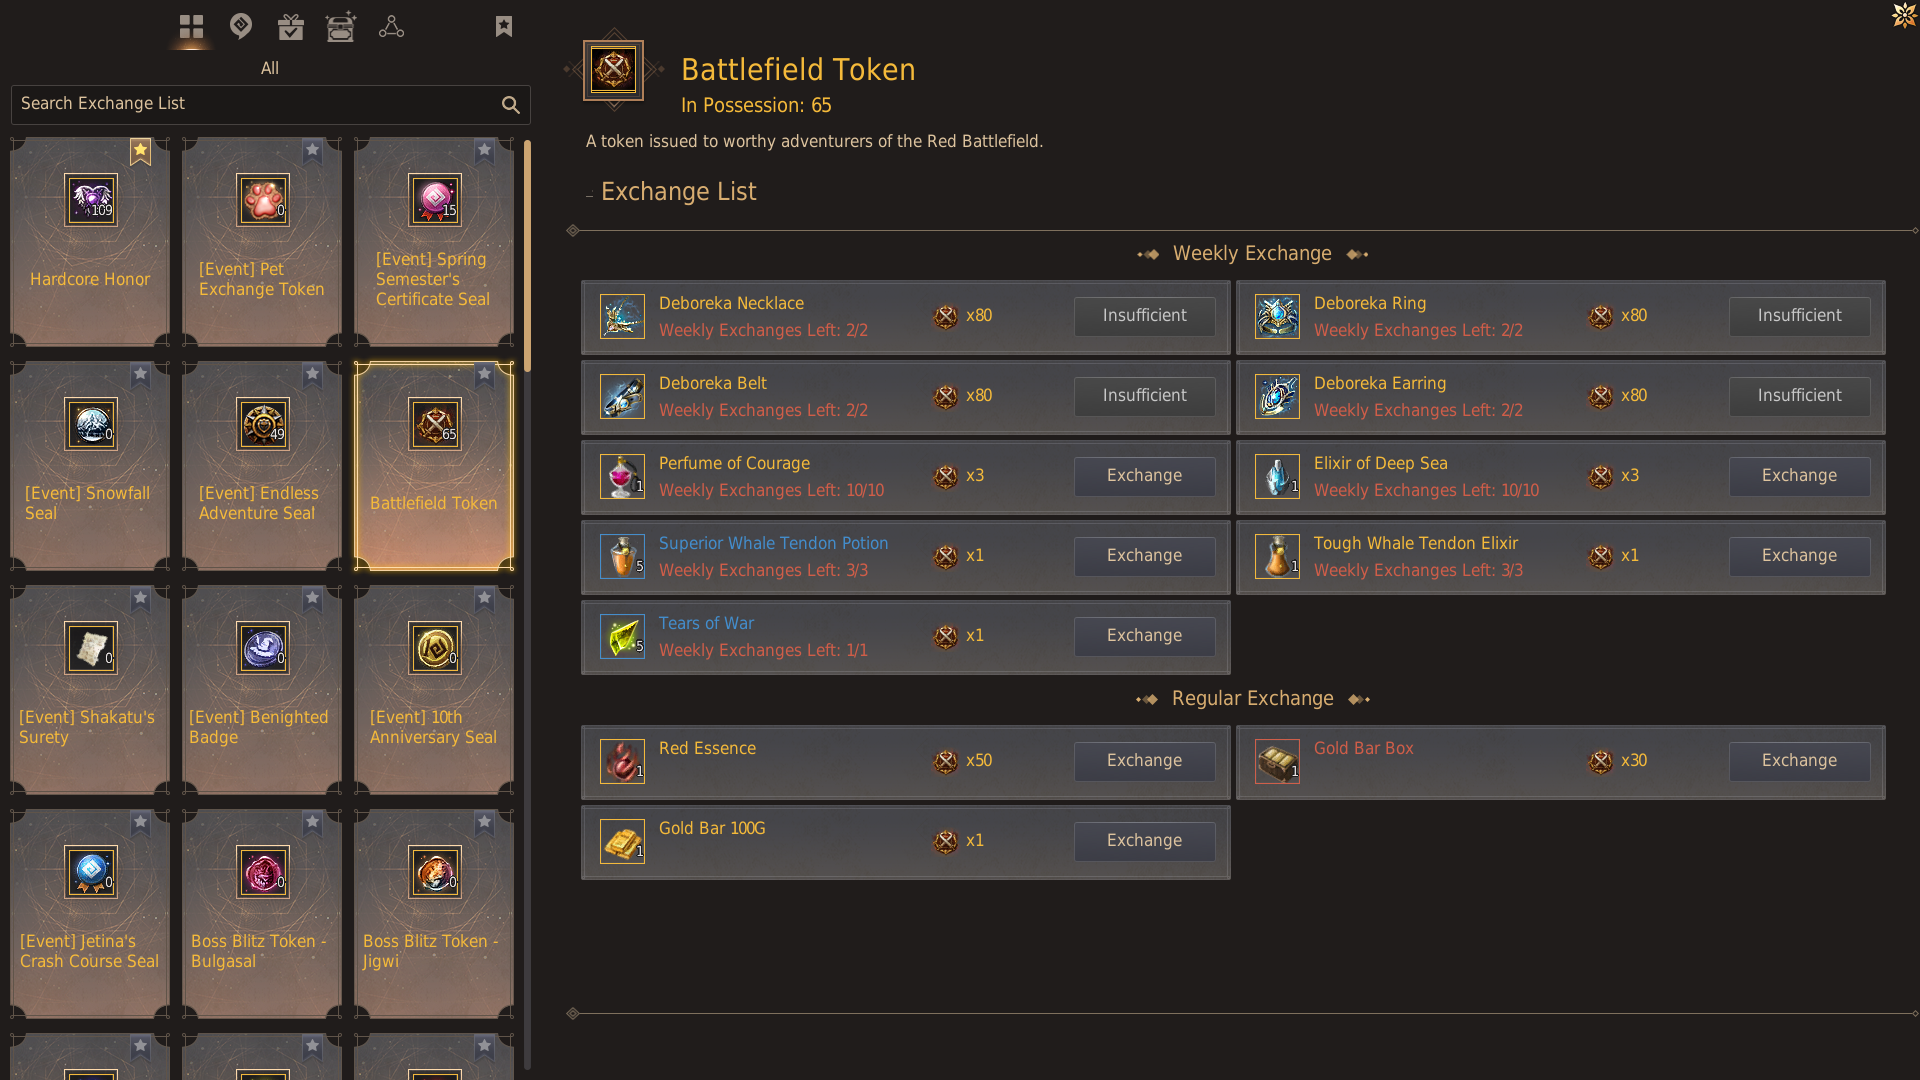
| Exchange Limit | Battlefield Token Qty | Exchange Item |
|---|---|---|
| Twice a week | ||
| Twice a week | ||
| Twice a week | ||
| Twice a week | ||
| 10 times a week | ||
| 10 times a week | ||
| 3 times a week | ||
| 3 times a week | ||
| Once a week | ||
| Unlimited |
|
|
| Unlimited |
|
|
| Unlimited |
Combat EXP Gained
| Level | Combat EXP received from defeats (%) | Combat EXP received from wins (%) |
|---|---|---|
| 50 | 25% | 32.5% |
| 51 | 25% | 32.5% |
| 52 | 25% | 32.5% |
| 53 | 25% | 32.5% |
| 54 | 25% | 32.5% |
| 55 | 25% | 32.5% |
| 56 | 20% | 26% |
| 57 | 20% | 26% |
| 58 | 20% | 26% |
| 59 | 7% | 9.1% |
| 60 | 3% | 3.9% |
| 61 | 1.5% | 1.95% |
| 62 | 0.3% | 0.39% |
| 63 | 0.15% | 0.195% |
| 64 | 0.02% | 0.026% |
Rankings
You can view the Rankings by pressing “ESC” and then clicking “Information” and “Ranking” on the main menu.
Here you can view the rankings for each profession as well as the battleground rankings. The buttons along the top will filter the rankings for each of these. The last button is for the Red Battlefield and is based on how many points the player has earned in the battleground.